 I love taking little scraps of things – whether they be paper, lace, or fabrics – and turning them into pretty accessories. Plus I also have an obsession with teeny, tiny things…like mini-books, which can hold all your secrets and ideas, stored away on your person. And what better way to create a personalized gift for a loved one this February? I dreamed up this DIY for Valentine’s Day – which will use up a very tiny amount of little bits of fabric, leather (or pleather, vinyl, or other fabrics), and cardstock you may have lying around. Here’s how:
You Need:
 small amounts of: leather/pleather/stiff fabric / printed or colored cotton / cardstock / sticky-back foam
jumprings / necklace chain / lanyard clip for keychain
Tools: E6000 glue (or other flexible, clear glue for different surfaces) / shears that cut leather / super-fine pen (Micron pens are my fave) / ruler / tape / awl / pliers & jumpring tool (not pictured)
How To:
 1. Measure a rectangle 7/8″ x 1 and 5/16″ onto the back of your sticky foam. Measure out a thin rectangle next to it (almost 0.25″ wide x 1 and 5/16″ tall), and another rectangle the same size as your first.
 2. Cut out the rectangles – which will become the backing for your mini-book.
 3. Spread glue on the front of the rectangles, and glue them onto the back of your fabric, allowing a small space in-between them.
 4. Trim your fabric around the rectangles, leaving a scant 1/4″ of fabric around, and cutting a diagonal at the corners.
 5. Peel up the edges of the foam sticky backing paper (just the edges, mind you), and stick down the fabric around the edges.
 6. Place the book inner part on top of the wrong side of the leather (or whatever you’re using for the cover), and cut around it, leaving about 1/8″ all around.
 7. Peel up the entire foam sticky backing paper, and affix the book inner piece to the wrong side of the leather.
 Press with your fingers to slightly crease the leather around the spine, just like a real book would be.
 8. Make the book pages: measure out a long rectangle 6 and 7/8″ x 1.25″ on your cardstock.
 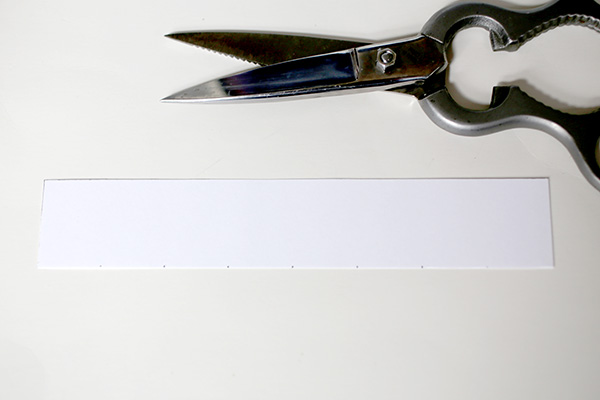 Mark every 7/8″ along.
 9. Cut the piece of cardstock out, and fold at every mark you made to create an accordion of pages.
  (Make sure your accordion starts and ends with the last page free to be stuck to the inside of your book cover…not as part of a finished accordion pleat.)
10. Secure the pages in the center with a piece of tape. (I also snipped off the edge with my pen marks on it.)

11. Spread glue on the inside cover of the book, and along the spine.
12. Press the bundle of pages into the spine, fold the book closed, and affix the ends of the accordion onto the inside covers of the book. Allow to dry.
 13. Once dry, write something special on the inside pages: the date you met, happy memories, What I Love About You, a special poem that has meaning for both of you, your wedding vows…or leave it blank to fill it with beautiful sayings and ideas as you go! You can also take a gold pen and add little details to the outside of the book, like an engraved gilt-edged vintage book might have…but I chose to keep my necklaces rustic and simple.
14. Use an awl to pierce a hole in the book at the corner.
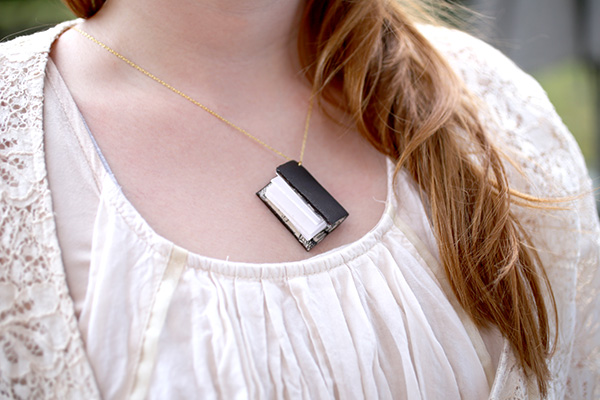
14. Add a jumpring, and attach to a necklace (for Her gift) or a lanyard clip to be attached to a keyring (for His gift).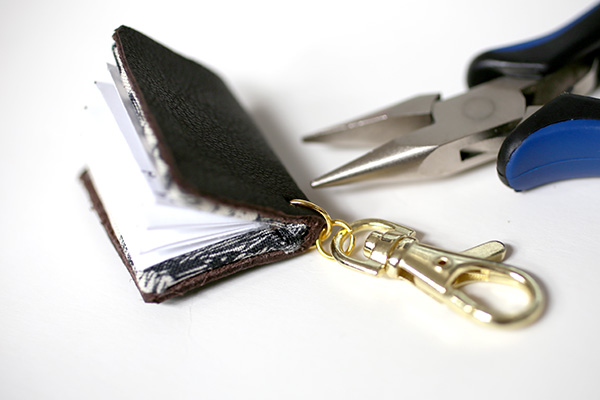
 What do you think?
  How beautiful and personalized this would be for that special someone?!
Also: I’m totally addicted to making these mini-books! I am going to be making a whole bunch more in different fabrics with ribbons and lace trims and charms.

 Is anyone interested in purchasing kits for these? I’m thinking of putting together little DIY kits for these books! …Just wondering!
 Stay chic and Happy Valentine’s Day~
xo
Carly


This is so cute! Love how detailed your tutorial is and that you can actually write in the book. I’ve posted two finished photos of your DIY and a link back to you on truebluemeandyou.
Thank you so much!! 😀
This is adorable! Love it Carly!
Love this! So romantic! Especially like how it can be a necklace or a keychain. Oh, by the way, I love the red leaf tree in your photos.
Thank you Tamara! 🙂 …Red leaf tree…? Must be my Japanese maple tree in back of my deck…though right now it is sadly devoid of any leaves whatsoever! :-/
Adorable! I’ll have to give it a try. Thanks for sharing with us!
Really cute! I like the idea of putting the book on a key chain.