Jun 1, 2020 | DIY
It’s June and Summer is coming! For many, hot weather is already here. I’m dipping into my archives today to share with you 10 no-sew DIY Summer projects for t-shirts and tank tops – so you can look cool, calm, and collected despite the rising temperatures.
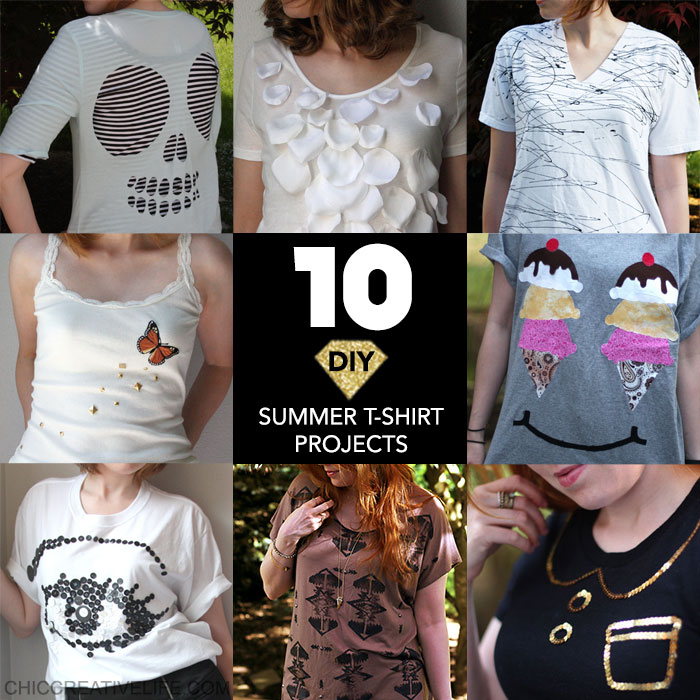
10 Easy No-Sew DIY Summer Projects for T-Shirts and Tank Tops
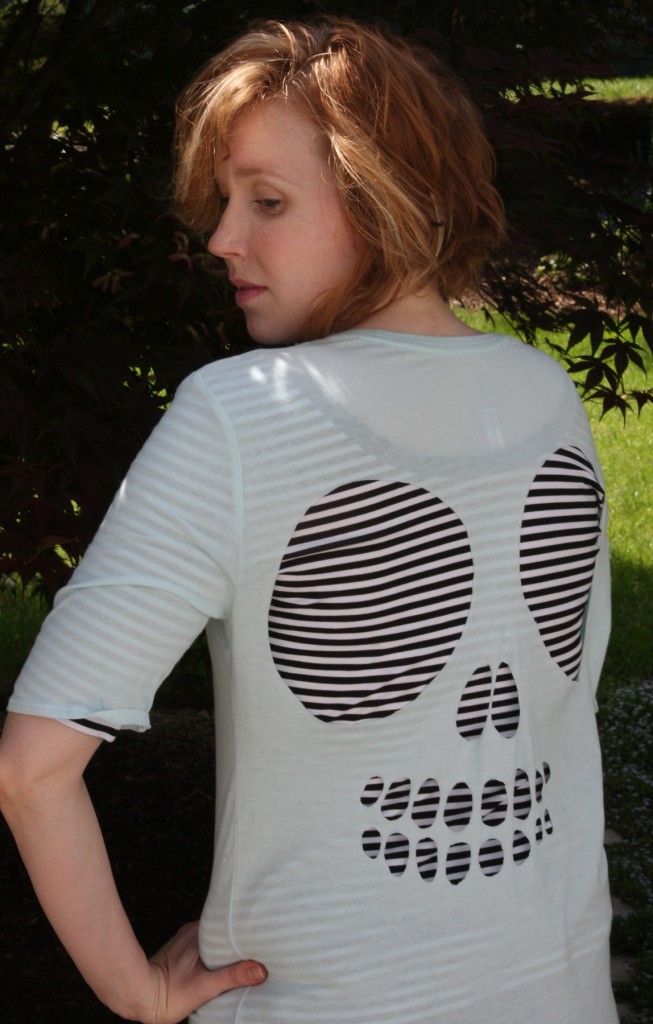
1. Cut Out Skully T-shirt
Although the skull-back style is a little dated by now, you can accomplish the same things with just a pair of scissors and your imagination – butterfly and ladder shapes are always popular! Choose a t-shirt or tank top made of thin, stretchy fabric so the cut edges don’t unravel.
2. Petal-Front Top
This is one of my most popular projects – it’s so charming and ladylike! All you need is a fabric flower (or two) and fabric glue to recreate the look. So pretty peeking out from under a cardigan!
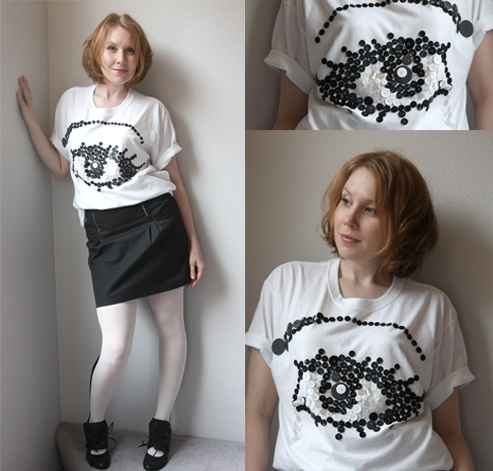
3. Avant-Garde Artistic Button Embellished T-Shirt
This is a time-consuming project that packs a ton of visual punch with buttons and fabric glue again. Try different images (a rainbow, a flower) to make out of buttons – and choose colorful ones from your button stash! Also a fun project to make with kids.

4. Happy Ice Cream Face Applique T-shirt
If you have some fabric scraps on hand that you love and want to showcase – this applique t-shirt project is for you! All it requires is iron-on fusible web and an iron to attach.

5. Patriotic Punky Iron-On Tank
For a punk look you can go old school, slash a tank and safety-pin it back together. I had a military-style iron-on that was begging to be used for this project!

6. Butterfly-Embellished Tanktop
A cute applique like a butterfly or other insect is made more adult by adding a studded trail behind it…you could do rhinestones instead and a unicorn applique for complete over-the-top girliness!
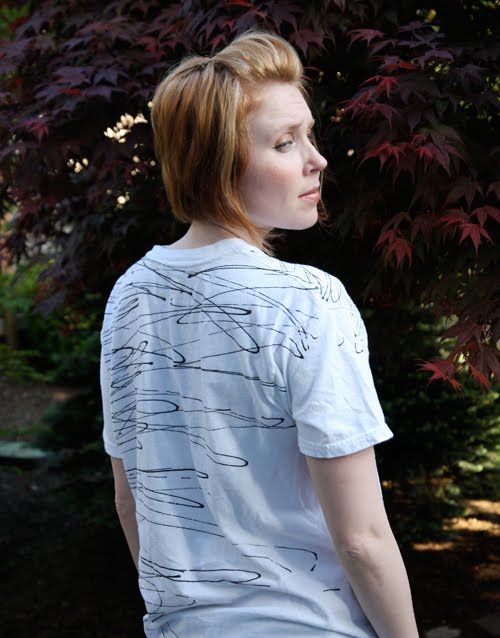
7. Scribble Tee
This was one of my first T-shirt makeover projects – super-easy and hides the flaws on an old dingy T-shirt pretty well!

8. Corseted T-Shirt

9. Tribal-Print Festival T-Shirt
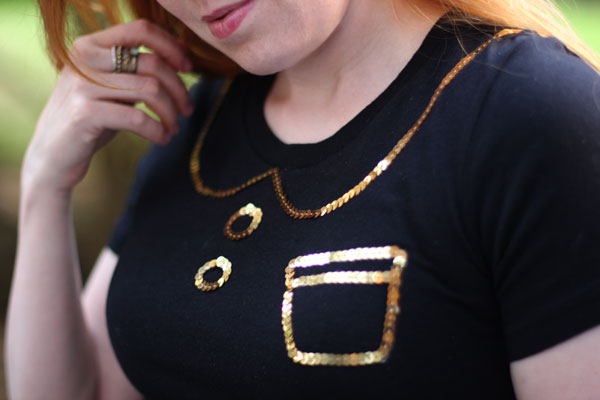
10. Sequin Trompe L’oeil Peter Pan Collar T-Shirt
Hope that gives you some ideas for your next Summer T-shirt or tank top makeover!
xo
Carly
Leave Comment
May 28, 2020 | DIY

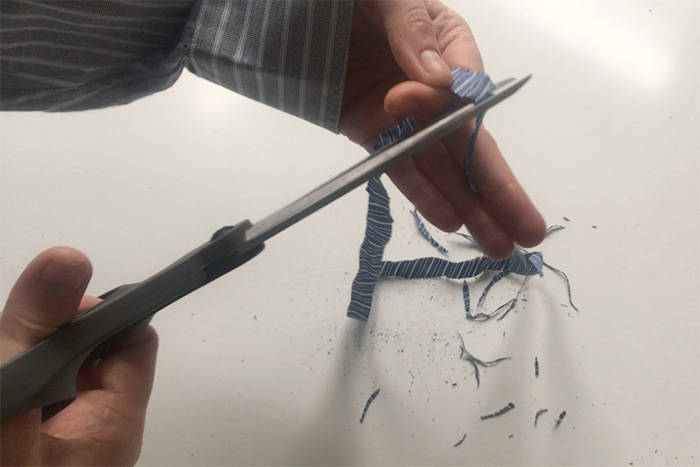
If you follow me on Instagram, you would have seen the DIY No-Sew Face Mask I posted a quick video tutorial for the other week. Even though some states are lifting stay-at-home restrictions and people are beginning to venture out again, I figure better late than never! And it’s another way to use up shirt scraps from any DIY men’s shirt makeover you do. This tutorial is super-easy and makes a double-layered mask, and although I find it difficult to breathe through for long periods of time, it’s great in a pinch. Plus – no sewing required! Just a pair of scissors…and a shirt sleeve. It should take you less than 5 minutes to make!
How to Make Your Own DIY No-Sew Face Mask from a Men’s Shirt
You Need:
scissors / top of a shirt sleeve
How To:

1. Start by cutting the shirt sleeve from the body of the shirt around the armscye.

You’ll want to cut around the armscye seam so it is a loop.

2. Cut another loop of fabric around the circumference of the top of the sleeve.

Now you have 2 fabric loops.
Trim any raw or ragged edges around the edges of the loops.

3. Place the sleeve on a flat surface, and your palm on top of it with fingers outstretched along the sleeve seam. Measure the distance from your outstretched thumb tip (at the top of the sleeve seam) to your outstretched pinky tip, and cut the sleeve at that point.

4. (Optional) Tuck the raw edges of this piece of fabric inside to hide them.
5. Cut the loops you made in Step 2. open.

Tie one pair of their ends together in a square knot.

6. Thread this long tie in a U-shape into the large piece of fabric cut from the sleeve in Step 3, so the bottom of the U extends below the large fabric piece.
When you go to wear the mask, place the bottom of the U at the back of your neck and the fabric piece at the front of your face. Pull on the end of each tie to tighten the mask placement on the bottom of your face. Then tie the ties in a bow over your ears and at the back (top) of your head. Scrunch the mask fabric so it sits properly on the bottom of your face and covers your nose and mouth.

And you’re done! Simple, right??
Check out my video below on Instagram and follow me there!
Also…this article here has a lot of great information about how to keep your mask clean, so definitely check it out too!
xo
Carly
Leave Comment


