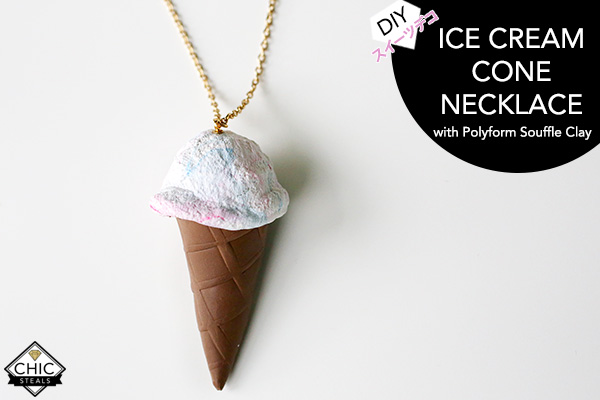
 What says Summer better than Ice Cream? I LOVE incorporating kawaii clay foods into things I make (hence, my Deko Sweets series), and I was excited to work with Souffle Clay to fashion my newest yummy-looking creation! What could be cuter? Here’s how to make your own with this special new lightweight clay:
You Need:

Polyform Sculpey Souffle Clay / necklace chain (not pictured) / screw eye / clay roller / clay cutting blade / plastic folder (or non-stick mat to work on) / foil / old toothbrush / glue for plastic (not pictured) / matte acrylic sealant and brush (optional, not pictured) / toothpick (optional) / square eraser block, stamp, mechanical pencil refill lead tube, or other cube-shaped item
How To:
 1. First, make the waffle cone clay by mixing some brown clay with yellow, red, and some white. It’s a little hard to explain ratios, but I found that brown:yellow:red:white was around 2:2:1:1. You may have to play with it to get the exact shade you want, but ice cream cones are usually a light, warm tan.
 2. Once you’ve kneaded your colors until they are one solid ball, use the clay roller to roll out the ball to around 1/8″ thick on a plastic or silicone mat. (I like using a plastic file folder.)
3. Use your cube to press a waffle pattern into the clay. I used the end of a single letter stamp, but found it was a little bigger in scale than I wanted.
4. Use the clay cutter to cut a triangle in the clay, leaving the one short side rounded.
 5. Roll the triangle up into a cone shape, folding the rounded edge on the outside. A toothpick can help seal and smooth the seam.
6. Trim the top of the cone so it is straight across.
7. Stuff a small ball of foil inside the cone so it doesn’t collapse, and place on a piece of foil, folded over to make a pouch. Bake in the over according to the clay instructions.
 8. Make the ice cream on top by mixing white with small dots of blue and pink. You don’t want to mix these fully, just enough so you end up with ribbons of color throughout the white.
9. Make a small ball of foil as your base, and place onto the cone. Press the clay on top of it in a mound to conform to the shape of the cone, then remove the clay + foil ball.
10. Use the toothbrush to texture the clay. The more you press, the more it begins to resemble ice cream, especially if you create some lumps around the base where it would be “melting” onto the cone.
11. Use the cone to gauge size and placement of the ice cream. Screw the screw eye into the top of the ice cream to leave a small hole, but remove for baking.
12. Bake the ice cream in the exact same way as the cone.
13. Once cooled, glue to ice cream top onto the cone part.
14. Attach the screw eye with a small dab of glue, inserting into the hole you made.
15. Attach the necklace through the screw eye.
16. If you want, you can brush acrylic sealant onto the cone and allow to dry fully.
 And that’s it! A super-cute, delicious and realistic ice cream necklace just for Summer! These would be awesome gifts for a graduating girl, or a project to do at a sleepover party. The great thing about Polyform Souffle Clay is that it is super lightweight, does not crack when baked, and comes in a variety of fashionable colors so you can mix them to your heart’s delight!

Plus it’s able to make clay “ice cream” look super fluffy and delicious!
You can learn more about Polyform products here:
Facebook / Twitter / Pinterest / Instagram
To see how other bloggers use Polyform Souffle Clay, check out all their fantastic projects below!
Happy DIY’ing!
xo
Carly
FTC Disclosure: This post was part of a paid campaign with BluePrint Social and Sculpey. I received the Sculpey Essential Tool Set and Sculpey Souffle Clay to review and create a project. The above opinions are my own. To read my full Disclosure Policy, click here.


It’s so pretty!
Thanks, Akaleistar!:-)