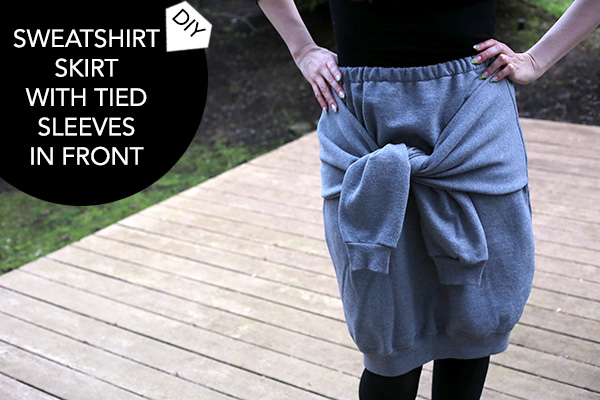
 As I posted (quite awhile ago now!), skirts and dresses with faux sleeves tied in the front are a mini-trend that has made it all the way from the runways of Celine to everyday street style. It’s a cute way to define the waist and yet add a casual twist to any outfit.
  I figured it would be super-easy to re-purpose a sweatshirt into a little skirt with the sleeves as non-functional accessories. With 5 straight seams to sew, it’s also fairly quick and easy, even for sewing beginners. Here’s how to make your own version of this look:You Need:
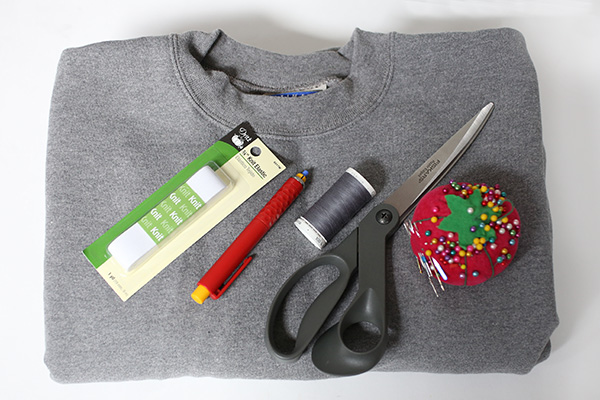 sweatshirt (choose a size larger than your normal size for extra length – mine is a Large Hanes Ultimate Cotton Adult Crewneck in Oxford Gray) / scissors / pins / needle for knits + matching thread / 1/2″-wide waistband elastic / sewing machine / safety pin (not pictured)
How To: 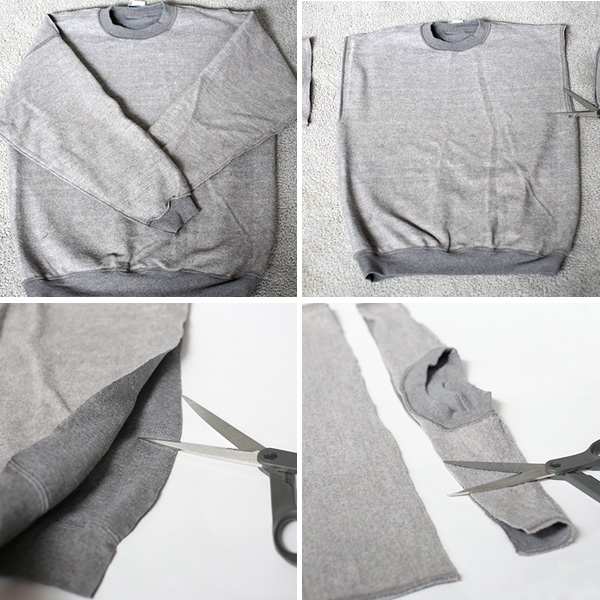 1. Lay the sweatshirt onto a flat surface, inside out. Cut off both arms, going straight up to the shoulders.
2. Cut open the sweatshirt at the sides (or along the side seams if there are any).
3. Cut off the top of the sweatshirt, right below the neck ribbing and going straight across.
 4. (Usually the arms on large sweatshirts will be just too large to look chic on a skirt – so we need to take some bulk off the bottoms.) Pin each arm above its original seam, starting near the cuff area and going all the way to where you cut.
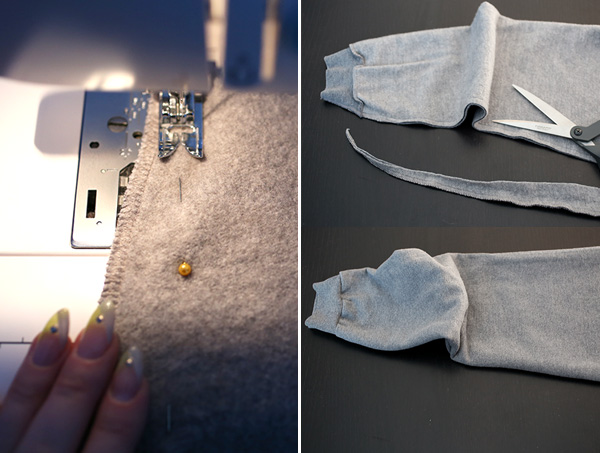 5. Sewing time! Sew those arm seams from where the seam begins at the cuff, angling higher up the sleeve all the way to the raw edge.
6. Trim off the excess fabric below the new seam…
7. …And turn the sleeves right side out.
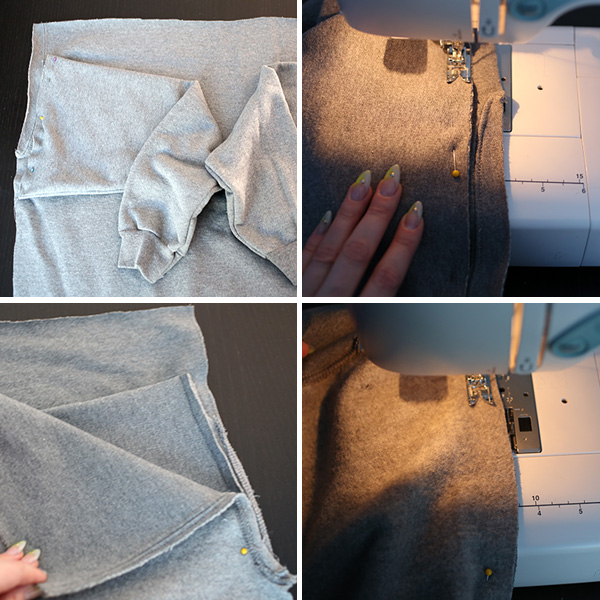 8. Pin the raw edges of each sleeve to the sides of one of the sweatshirt body pieces. Make sure each sleeve is about 1.5 – 2 ” below the top raw edge of the body piece.
9. Stitch each sleeve down to the body piece to secure.
10. Now make a body-sleeve-body sandwich: Place the piece you just sewed right-side-up on a flat surface. Place the other sweatshirt body piece on top of the piece you just sewed, matching the cut edges and bottom ribbing. Pin at the sides.
11. Stitch the two body pieces together at the sides, making sure the line of stitching is towards the inside of the line that secures the sleeves to one of the body pieces (we don’t want that seam showing on those sleeves!!)
 12. Trim excess fabric from the side seams.
13. Fold down the top part of the skirt to the inside, about 1″ or so. Sew this down about 3/4″ from the top, leaving an area about 2″ long unsewn near the back or side of the skirt. 14. Stretch a piece of waistband elastic around your waist. Pull taut and cut exactly where the ends meet.
15. Attach a safety pin to the waistband elastic, and thread into the gap you left at the waist.
16. Thread it all around the casing you sewed (being careful not to let it twist on the inside), and bring the end back out the gap in the casing seam.
17. Overlap the ends about 1″ or so, and stitch a rectangle over them on your machine.
18. Slip the sewn ends inside the casing, and stitch the casing seam closed at the gap.
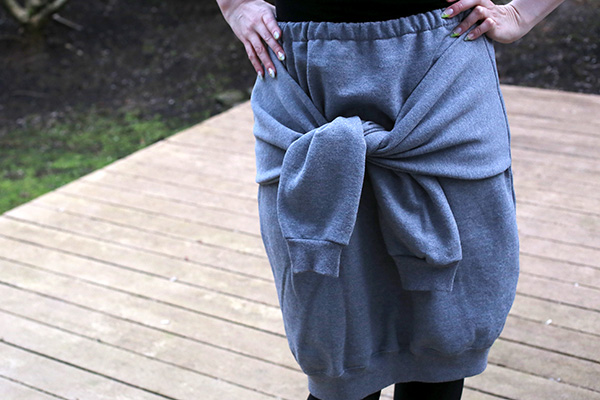
19. Try on your skirt and tie the sleeves at your waist.
And you’re done!
In order to maximize the true high-low potential of this piece, I’m pairing it with a white button-down shirt (tucked in, of course) and black booties – or a cute little crop top for when the weather warms up.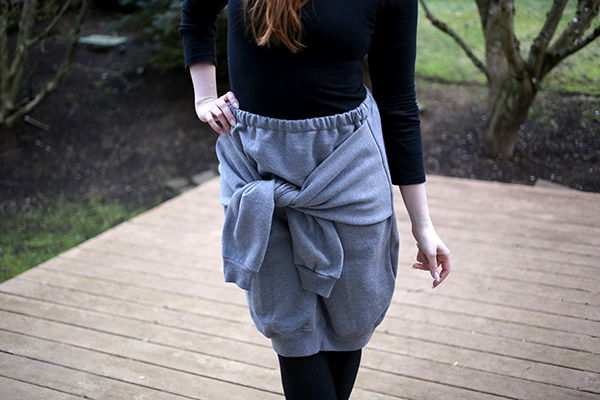
 Happy DIY’ing!
xo
Carly


