May 20, 2016 | DIY
So ladies…right now button-down shirts in blousy, dressy shapes are all the rage. I’m loving it because that means my Men’s Shirts DIY’s are once again totally topical! (The posts may be a little older and photos not great, but you can still follow along!)
Here’s how to get your craft on with 5 different projects to makeover a man’s shirt into a super-cute DIY piece for yourself:
DIY Cute Summer Shirt Dress (from a Man’s Shirt)

DIY Babydoll Dress (from 2 Men’s Shirts)

DIY Convertible Skirt (from 3 Men’s Shirts)

DIY Jumpsuit Romper (from a Man’s Shirt)

DIY Bustier Dress (from a Man’s Shirt)

Happy DIY’ing!
xo
Carly
Save
Leave Comment
Jun 3, 2014 | DIY
 It seems like an age since I posted I posted about Daisy-Print Inspiration here on the blog…but yes, this print is still trending amongst street style and retailers lately. I DIY’d an oversized sweatshirt in this neat pattern, and though it may be a little out of season by now, you can always do this on a more lightweight material.
  Plus you can customize the flowers exactly how you want! Here’s how:
You Need: (more…)
Leave Comment
Feb 27, 2014 | DIY
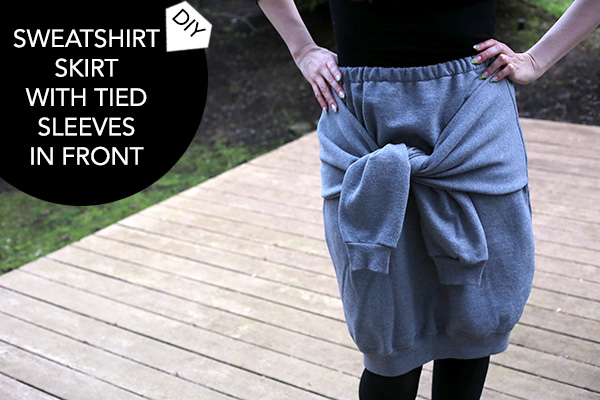 As I posted (quite awhile ago now!), skirts and dresses with faux sleeves tied in the front are a mini-trend that has made it all the way from the runways of Celine to everyday street style. It’s a cute way to define the waist and yet add a casual twist to any outfit.
  I figured it would be super-easy to re-purpose a sweatshirt into a little skirt with the sleeves as non-functional accessories. With 5 straight seams to sew, it’s also fairly quick and easy, even for sewing beginners. Here’s how to make your own version of this look: (more…)
Leave Comment
Jan 7, 2014 | DIY
 Hello again everyone! After almost a week without Internet, I finally received my new router and am connected once again. (*huge sigh of relief*)
Today I am over on We Heart This, posting this cool DIY for making your own initial stud earrings…out of alphabet pasta! Check it out below!
 xo
xo
Carly
Save
Leave Comment
Dec 8, 2013 | DIY
“Make the workmanship surpass the materials.”
-Ovid
I absolutely love using unconventional materials in my DIY’s. To me, any and everything could be used for a wearable – and I never hesitate to question “Could I use that?” if I find a texture, shape, or pattern interesting. Anywhere, even the Home Depot, Wal-Mart, or garage sales – could offer up a potential material that could be used for a DIY. Some of my favorite past DIYs include these unconventional materials, including my DIY 80’s Acrylic Earrings from a Photo Frame, DIY Lace Maxi-Skirt from a Curtain, DIY 40’s-Style Kitty Beret from a Pirate Hat, DIY Bolo Tie Style Necklace from a Shoelace, and DIY Boho Bangles from Curtain Rings. 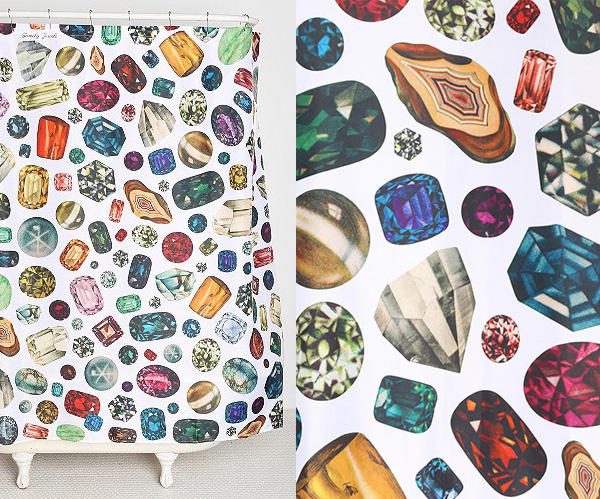 Enter the unassuming polyester shower curtain. From a pin on Pinterest I found this gorgeous gemstone pattern (above) – and followed it to UrbanOutfitters.com where I found it was actually a shower curtain by a company called Family Jewels, a Danish interior design company. (And it’s still available for purchase!)
Family Jewels Diamond Shower Curtain, $44.99 (sale)
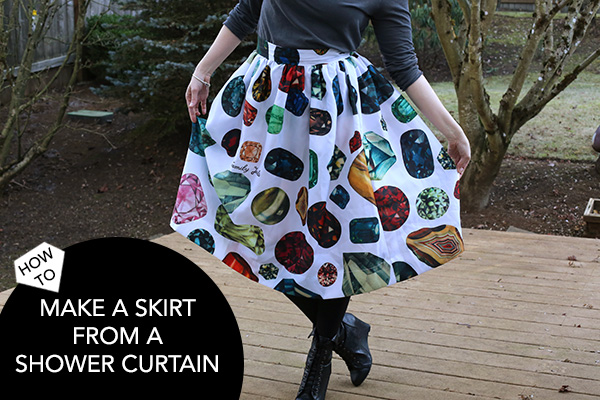
I loved the pattern so much I couldn’t resist the opportunity to do something amazing with it – so I snapped it up and waited impatiently for it to arrive. When I opened the package I found that it was made of a stiff, somewhat waterproof polyester, which to me felt a bit like a stiff satin or taffeta…which got me thinking ballroom skirts. Billowy, poufy, elegant – and perfect for holiday parties! So I set about making my own. Here’s how I did it:
You Need: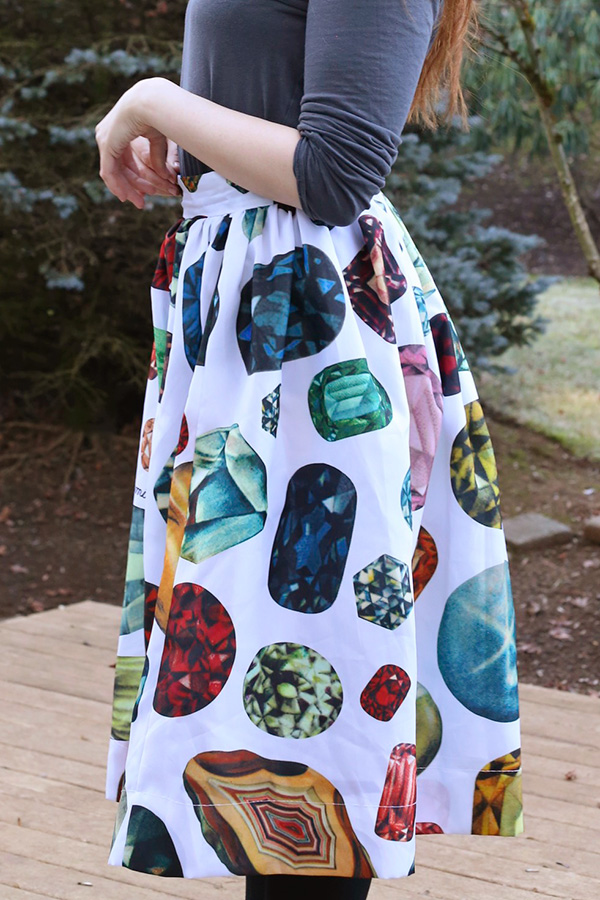
1 shower curtain / fusible lightweight interfacing / iron + ironing board / scissors / pins / marking chalk / measuring tape / matching thread / sewing machine + needle for lightweight polyester / 9″ long invisible zipper / overlocker or serger (optional)
How To: *sorry no photos of the process/materials, since I actually made the skirt at about 1 AM in my living room!
1. Basically, I followed this tutorial here for the making of the skirt, so full credit needs to go to Gertie’s Blog for Better Sewing. HOWEVER, make sure that when you cut you do it on your fabric that is folded over, so you are cutting 2 of each pattern piece and the waistband is one long length since it was cut on the fold (it escaped my notice until Part 2 of the tutorial, which was entirely my fault.) For my skirt, my measurements were: 41″ long and 32.5″ high. My waistband was 32″ long and 4.75″ high. (Both including about 0.5″ of seam allowance.) I also utilized the finished edges of the shower curtain in my cut piece so that I would have less overlocking to do.
2. I then overlocked all raw edges, except those that would be hidden inside the waistband.
3. Then, I followed Part 2 of the tutorial for the construction of the skirt.  It came together quite quickly and I made it in about 2 hours the night before I had to go to the airport to go to the 3-day Lucky FABB event in October!
When I attended Lucky FABB, my DIY Ballroom Skirt from a Shower Curtain caused quite a stir, with bloggers stopping me to ask me where I got it, and Erica Domesek of P.S. I Made This even going so far as to compliment it when I asked a question to her during a panel. (!! what a moment!!)
This skirt also looks amazing when worn over a crinoline or a petticoat so that it has even more stiffness and stands away from the body more. If you are in the market for a new ballroom skirt like this one, definitely check out home decor stores now: with it being the holidays, shimmery, sequinned, sparkly shower curtains are readily available…and much, much cheaper than buying a skirt ready-made. 
 How about you? Have you ever used unconventional materials for something that turned out much better than you hoped?
Do tell!
Happy DIY’ing!
xo Carly
Save
Leave Comment


