Jun 16, 2010 | DIY
While I am still distressing over our lost family pet (now missing for over a week), the only thing I have been able to do besides put up posters, hand out flyers, and spend hours staring outside and waiting for the phone to ring…has been to watch reruns of Law & Order. They always find the missing person in the end.

And blog-land wise, the only thing I have been able to do on the computer is indulge myself in a blog I cam across called Tea Rose Home. The writer of it, Sachiko, is a stay-at-home mom with 3 children, and she blogs about beautiful items: ruffles, quilts, t-shirt makeovers, children’s clothing, and home decoration projects that add beauty and happiness to her life. I’m amazed at the number of creations she makes, and the feminine quality to each one. Plus her attitude (in the face of 3 rare disorders that have had her in and out of the hospital her whole life) is inspiring and uplifting. Reading her words about how much she loves her family, the happiness she finds in crafting, and her positive attitude has really helped lend me strength in this dark time. Plus, her projects are just beautiful – and she loves forming baskets into handbags – something I love as well!
I made this basket after seeing something similar in a Japanese magazine awhile back. It is real fur, sadly – a rabbit fur that I had bought a long, long time ago and had put in my materials bag to try and figure out what to do with it. In the years after I began to feel disgusted about using real fur, and so couldn’t bring myself to use it in anything. But I also couldn’t bring myself to throw it away, which would be so disrespectful to the life of the animal.
Muffin [our lost cat] loved it, and often pulled it out of my bag, playing with it, stroking it, and sometimes sleeping with it. So I put it on a basket, kind of like a good-luck charm. It’s removable for when Muffin comes back, and now sits on my desk so I can stroke it and remember how much she loved it, while I am willing her quick return.
A cheap basket from Michael’s which didn’t have a lid was transformed into this by cutting two pieces of foamcore that would become a hinged lid inside. I added hinges and a latch from the hardware store, securing the screws I drilled into the foamcore with hot glue. The latch I secured onto the basket with thin wire from the jewelry-making section.
I then hot-glued a layer of lace around the edge of the lid from a lace table runner I found at Goodwill for $1. (Come to think of it, Goodwill had TONS of baskets there too – I should have bought there instead of spending $6.99 at Michael’s. Next time.)
Finally, I wound a lace ribbon around the handle, and added some lace bows on either side. I then added a muslin liner, and my pretty bag was done!
Once Muffin returns and wants her fur back, I will probably replace it with a layer of pretty fabric, or some faux fur on top instead.
Have any of you ever remade a basket before? Hope this gives you some ideas – and for more great ideas for basket makeovers, check out Tea Rose Home and all the beautiful basket handbags Sachiko creates there.
xoxox
Carly
linking to Tea Rose Home link party No. 12 and Avid Accents Make My Style Monday #6
Leave Comment
May 4, 2010 | DIY
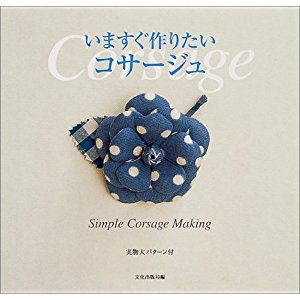
 With Spring officially here and Mother’s Day just around the corner, I’ve had flowers on the mind. But not just the ones growing in my garden – handmade ones, using scraps of fabric from a number of past projects. I’ve posted before about one of my favorite flower-making books, “Ima Sugu Tsukuritai Co-saju” [“Corsages I Want to Make Right Now” Bunka Publishing, 2006].
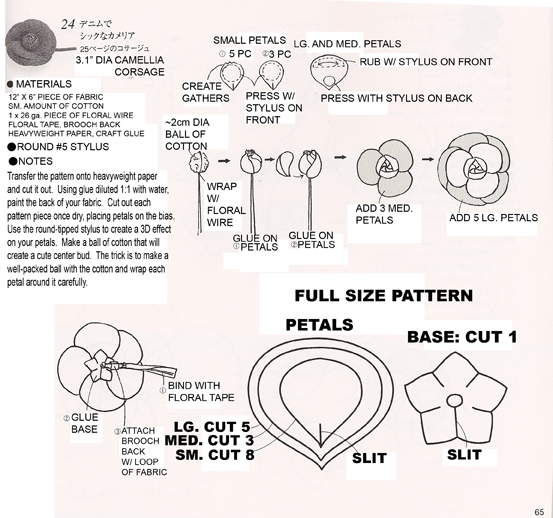
I shared the camellia flower pattern before, so I’ve reposted it below for you guys:
My English translation is above. The book page is 8 1/8″ wide by 7 7/8″ high if you want to print it out, in order to make sure the petal pattern is sized correctly. The pattern requires the use of a round-headed stylus (also called a “cup”) in order to create the rounded, 3D-effect to the petals. Not completely necessary, but it helps create a finished, professional look to your corsage.
From last year’s Men’s Shirt to Cute Summer Shirt Dress tutorial that I wrote, I used some extra leftover fabric to make a carnation corsage.
Here is the how-to and pattern below:
Here are a couple more projects in the book…a dahlia:
And a lush camellia:

Okay…I’m all translated-out!
If you would like to check out more reference books in English for making fabric flowers, two of my favorites are Heirloom Ribbonwork , which constructs flowers out of ribbons, and Handmade Flowers from Paper and Fabric
 , which has more paper flower projects than fabric, but the projects can easily be adapted.


Both are incredibly inspiring and have you making different types of fabric flowers than just roses (which have how-to tutes all over the internet already)…but ribbon daffodils? velvet bouvardia? If you were patient and had a lot of time – they would make a beautiful bouquet for Mother’s Day, that lasts forever. Lovely blooms will break up any DIY monotony.
Have a flower-filled day!
xoxox
Carly
~If you liked this post, please share it!~
Leave Comment
Apr 14, 2010 | DIY
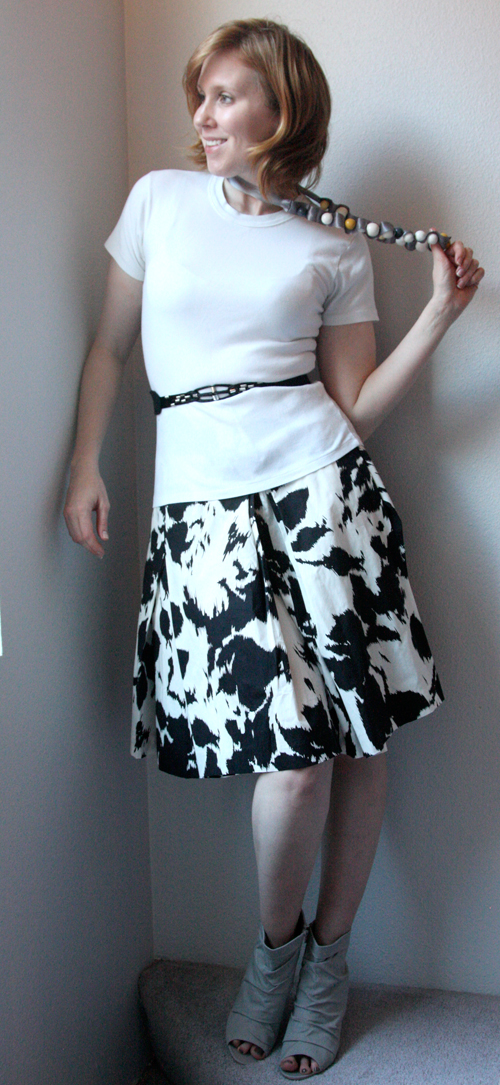
Summer is almost upon is, and style inspired by ancient cultures is in. Bold prints, bright colors, beads, and lacing: we’re seeing it on the runways and on fashionable girls on the street.
Create the above knotted belt out of satin cord and add jewelry findings for a fashion-forward Celtic infusion of style! (The lacing may look tricky, but once you get the hang of that, it’s a piece of cake!)
How to Make a Bohemian Macrame-Style Knotted Cord Elastic Belt
Materials You Need:
5 yd of satin cord (about 2.5 – 3 mm thick) *small amount of scrap fabric // 14 large crimp coil necklace ends (silver-tone) // 4 large silver-tone necklace end connectors // 1.5″ wide black elastic, cut to your waist circumference (we’ll be cutting it shorter below) // 2 snap fasteners
Tools You Need:
tape // scissors // wire-cutting pliers // sewing machine // regular to heavy-duty needle // thread matching belt color // snap-setting pliers or die & hammer // iron & ironing board
How To:
Prep Your Parts
1. Cut satin cord into the following pieces:
*FOUR pieces 14″ long (to make outer loop)
*FOUR pieces 18″ long (to make center knot)

2. Use pliers to press down the end coils of the crimp ends. Cut off the hang-loops of the end connectors.

3. Cut 4 pieces from your fabric, measuring 4.25″ wide by 3″ high. We’ll come back to those fabric pieces later.
Start Weaving: Outer Loop First

4. Thread 2 crimp ends onto a 14″ piece of cord. Loop it over and tape down the ends.

5. Tape down another 14″ piece of cord. Thread it through the crimp coil from the previous piece of cord…and add a crimp coil onto the cord.

6. Add another crimp coil, and loop it around.

7. Thread it back through the remaining crimp coil on the first cord. Tape down the end.

8. Secure the loop you just made with a piece of tape.
Keep Going: Inner Loop-and-Knot

9. Put a crimp coil on one of the 18″ cord pieces and tape down the end, placing it in the center and directly below the cord from the previous step.

10. Thread it through the crimp coil on the adjacent cord and loop it around to the right, then back under the first two cords, heading downwards.

11. Thread it over itself, then downwards under the first two cords again.

12. Loop it to the right, back over the first two cords, and then to the left under itself again.

13. Thread it back through the crimp coil on the adjacent cord.

14. Add another crimp coil, and tack down the end with tape.


15. Time for the final cord! Tape down the end of another 18″ piece of cord, and thread it to the right and through through crimp coil on the adjacent cord.

16. Add a crimp coil, and weave the cord around the center loop in the same manner as the previous piece. (It will be to the outside of the previous cord. Go under the previous piece, to the right, over the taped-down outer loop, up and around, under the outer loop cords, over the center loop cords and down…)

17. Keep following the center loop of the previous cord. (Around and to the right, over the taped-down center loop, back to the left, under itself…) And finally, thread it back into the crimp coil you added to it in Step 15).

18. Then tape its end down.

19. Shift the ends of all your cords together, re-tape, and push the crimp coils further to the right, closer to your center loop-and-knot.

20. Use pliers to add an end connector to the center cords just to the left of the taped-down loop. Smooth out your cords – and congratulate yourself on a job well done!
Other Side & Finish Lacing

21. Make one more group of looped cords in exactly the same manner. (See Steps 4) – 20)]

22. Place the two groups of cord side-by-side, matching up the centers. Add 2 more end connectors to the center loops to connect one side to the other. Now you’re finished with all that lacing – which probably feels fabulous!
Make the Belt

23. Tape both ends of the cord group on top of the ends of your piece of elastic. Make sure your cords are centered and each side overlaps the elastic the same amount.

24. Fold the elastic under itself, about 3/8″, and stitch the cords down on top. (I went over the same area twice with a straight stitch, then zigzagged down it for strength.) Stitch down both sides to the elastic.

25. Trim off the cord ends on the other side of your stitching.

26. Cut your elastic piece in half.

27. Place 2 fabric pieces right sides together, on top of where you’ve stitched the cords to the elastic. Trace the width of the elastic, and mark the width of the cords. Then draw a “D” shape between the elastic piece, about 2″ long.

28. Do the same for the other 2 pieces of fabric.

29. Sew around the “D” on each pair of fabric pieces, just outside you markings. Leave a small area unsewn on the flat side in order to turn them right-side-out.

30. Trim fabric around the sewing at about 1/4″.

Notch, then turn the pieces right side out. Tuck the unsewn areas’ raw edges to the inside. Press both pieces with an iron to flatten.

31. Place one D piece over where the cords are sewn to the elastic, in order to cover them. (Rounded edge of D needs to cover the cords but hang off the edge of the elastic.) Topstitch around edge of D, about 1/8″ from edge, to secure it to the elastic and the cords.

32. Try on belt, and center the knotted cord at your center front. Mark where the elastic meets at your center back. Cut elastic at that measurement.

33. Fold each end of elastic under about 3/4″. Sew down about 1/2″ from edge.

34. Set two sets of snaps in the elastic ends according to the instructions on your snap-setting pliers or die set.
Ta da! This tutorial looks complex, but doing it is incredibly rewarding – and the whole process is a lot faster than it looks!
Tip: If you want to make more of a statement piece, use thicker cord or rope, and thread it through large-hole beads instead of jewelry findings. You could even wrap strips of embossing metal around the cords instead of threading them through beads at all!
Have fun and go tribal:-)


It also doubles as a cute necklace at this size!


xo
Carly
as originally posted on Threadbanger.com
Save
Save
Save
Save
Save
Save
Leave Comment


 After spotting this editorial in Lucky Magazine back in winter, I decided I wanted a foldover-style boot too!
  So chic – and it visually slims up your legs, working in both casual and more edgy ensembles. But since I always make instead of buying new unless I absolutely must, I’m not going to plonk down $199 on a boot…especially when I already have a whole bunch of shorter boots that will work perfectly as the base (see below).
 Here’s how to make your own version, using an old beat-up leather jacket:


