I had purchased a bag of Bing cherries a little while ago, and they languished in my fridge for awhile. I guess I kind of forgot about them.

So when I pulled them out I realized that I had to use them up fast since they were turning a little brown here and there.
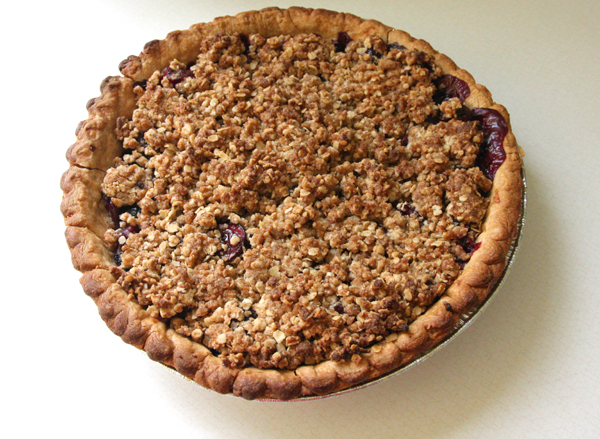
I made this Berry Cherry Pie to use them up.
I love that it doesn’t use canned pie filling (I like some cherry pie filling but not all – many are super-sweet and too syrupy, and make my throat hurt). Since this version uses fresh cherries, it has an interesting, subtle taste. And it doesn’t need a lot of sugar either – which is why I’m sharing with all of you! (As you may have noticed – the recipes I’ve begun to share here are basically adapted recipes of sweet and decadent things…just made lower in fat and sugar and better for you. I love my sweets – but I love them even more when they have more “good” than “bad”!)
Here is the recipe, which I found on Recipezaar.com (now Food.com) and adapted.
DIY Low-Sugar Berry Cherry Pie Recipe

Ingredients:
*1 store-bought frozen pie crust
Filling:
*4 c berries (I used cherries and frozen blueberries that I thawed in the microwave)
*1/2 c sugar (or you can use powdered fructose, but decrease to 1/3 c OR to taste)
*1/4 c water (I used the juice that drained off the blueberries when I thawed them)
*2 T cornstarch
*1 T lemon juice
*1 T vanilla
*1 dash salt
Topping:
*1/2 tsp cinnamon
*1/2 c brown sugar
*1/2 c flour
*1/2 c oats
*1/4 c butter, melted
1. Bake the pie crust according to directions for a “one-crust filled pie” (usually 400 degrees for 10 minutes). DO NOT PIERCE PIE CRUST WITH A FORK PRIOR TO BAKING – if bubbles form, push them back down.
2. Meanwhile, cook all the ingredients to the Filling EXCEPT the berries together in a saucepan on medium heat, whisking, until well-blended (about 5-7 min).
3. Stir in the berries.
4. Fill baked pie crust with Filling. Preheat oven to 375 degrees.
5. Stir all the ingredients for the Topping together EXCEPT for the butter.
6. Add the butter to the Topping and combine.
7. Sprinkle the Topping over the pie so there are no gaps.
8. Place some tinfoil around the edges of the pie crust to prevent browning and bake for about 45 minutes until Topping is golden and crunchy, and filling congealed.

Hope you try this some time when you have a lot of berries, fresh or frozen (strawberries? blueberries? blackberries?) to use up!
xo
Carly


So…your pie made me to make cookies with jam. Your pie looks so great…
Oh well…i just love your blog and your crafts. And you look like Amy Adams
🙂
Oh my. That sounds SO delicious and SO perfect for fall!
This pie looks delicious! I will have to try making it.
Pie,Pie,Pie…..crave to eat! Now im salivating watching these pictures.
I made this pie for my boyfriend who was coming home from a long business trip. He loves pie but hates all the sugar. And he absolutely loved it!! I put some lemon zest in with the berries just for alittle more zing. Next time I will add more lemon I think. Thank you so much for this recipe! It is now in our family recipe book!
El
Oh wow, thanks so much for trying out this pie! The lemon zest sounds delicious. You can even eliminate more sugar depending on how sweet your berries are…and even minimize the brown sugar in the topping if you want a drier, less-sweet topping. I found some sugar is necessary for the filling to make it “gel” properly so you aren’t just eating separate berries inside a crust. But cherries usually add such a sweet, deep flavor when cooked you really don’t need all the sugar that comes in canned filling…just using fresh berries + a frozen berry that has thawed and given off a lot of juice make for an excellent filling if you add a little bit of sugar to bind it all together. I’m so glad you liked it! 🙂