Sep 3, 2010 | DIY
This is a long one, so hang on for the ride…
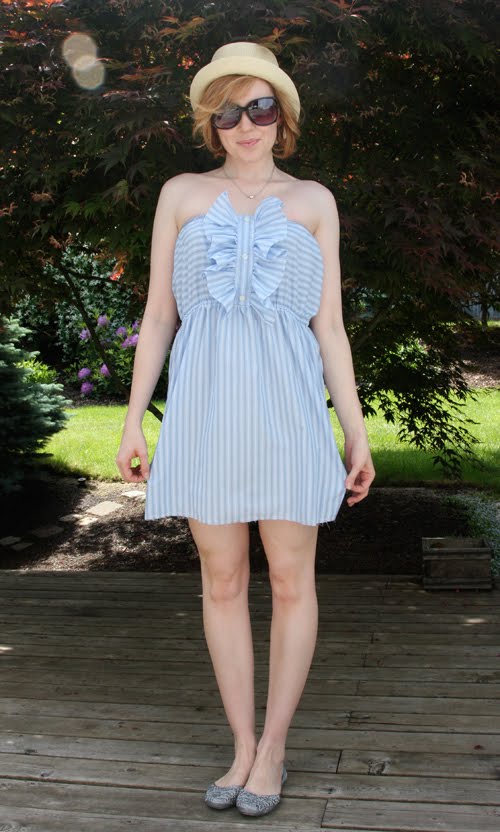
We’ll be using one ENTIRE shirt – and leave only the tiniest scraps behind when we’re done. It will take awhile, and this tute is probably not for beginners.
Project Difficulty:  (EXPERT)
You Need:
(more…)
Leave Comment
Aug 15, 2010 | DIY
So I spent the majority of the day today working on a tutorial for upcycling yet another men’s shirt into something way cuter for the girls! I can’t wait to take the photos of the finished product to share with all of you.
But that got me thinking…a reader asked me on formspring.me to share some tips for working with men’s shirts…and so I thought maybe I should share with all of you how I choose my shirts to re-work, and some techniques I use when sewing them.
How to Choose a Shirt
First of all, I’m assuming that you are going to use a shirt that is not new or off-the-rack (right??). Using shirts that have been pre-worn for your re-fashions is one of the best ways to be eco-friendly, save something from being discarded and give it new life, and make a one-of-a-kind piece just for your very own. But it does pose some unique challenges.
*Choose a shirt that is NOT SEE-THROUGH.
Unless you’re planning on making a lining or always wearing your finished piece over something, you have to make sure that the shirt you choose is completely opaque, even when you’re standing in front of a light source. Many men’s shirts are made of “summerweight” cotton, which makes them very see-through if you’re not wearing an undershirt like a guy would be. TRY IT ON if you’re in a thrift store that has changing rooms; if not, place your hand inside the shirt. If you can see your hand, it’s a no-go.
Pilled fabric. These shirts can only be upcycled very creatively. img source
*Do not use a shirt whose fabric is thinning, pilled, worn, frayed, or with stains/holes.
The more times the shirt has been through the washer/dryer, the thinner the fabric will be. If it’s visibly in bad condition, adding seams and making it into a dress it won’t help the situation. Do not choose something that is stained or has rips or holes in it unless the final design will cover those areas.
*In the same vein, do not choose a shirt whose seams are pulling.
Even if the shirt looks like it’s in good condition, pull at the side seams. If the fabric pulls away from the stitching and you can see obvious/large stitching holes down the seam, the fabric in that shirt cannot withstand seams that take stress. Stitching (even re-sewing) such fabric will result in visible holes, if not the fabric tearing completely away from the seam. DO NOT USE.
*Choose a shirt that is LARGER than you are.
This is a no-brainer. You need the extra fabric to work with and to make the details (and especially in case you make a mistake!). In most situations, I choose a shirt that’s as large as I can find.
How To Sew a Shirt
(so it doesn’t look like a re-fashion)
The shirt in question (since it’s pre-worn) will also probably be pre-washed…if not, wash to remove the sizing using the hottest water recommended for the fabric, and dry it according to the directions.
*Use the same color thread as what was used to sew your shirt together in the first place.This is a little obvious. Bring the shirt with you to the sewing store and match the thread color visually.
*Use the same type of thread as what was used in the shirt.
I know it’s a hassle, but read the fiber content of the label and choose the thread accordingly to get the most professional results.
100% Cotton or Linen Shirt (a typical Men’s Button-Down): Cotton mercerized thread [size 50]
Cotton/Poly Blend Shirt: Cotton/Poly thread [size 50]
Rayon or Stretchy Shirt; Knit Shirt: Polyester thread [size 50]
Lightweight Silk Shirt: Silk Thread [size A]
*Use the right needle for the fabric.
Usually I’ll specify the type of machine needle needed in my instructions, but in case you’re using a different type of shirt than what the instructions call for, match your needle accordingly. Needle for knits = used for any knitted fabric. Needle for wovens = used for any woven fabric. Even if your woven fabric has a bit of stretch to it (like a cotton/rayon blend, let’s say), still use a needle for wovens. If you’re unsure how to tell the difference between a woven fabric and a knit fabric,
check out this easy explanation here. And learn how to choose the right size needle
here.

*Replicate the stitching in the shirt by practicing first.
Alot of my instructions for re-fashioning men’s shirts call for visible stitching, topstitching, hems, etc. To make sure the stitches you are adding to the shirt match those that are already there, practice on a piece of scrap fabric that’s similar in fiber content to the shirt. Adjust the thread tension and stitch length until your row of straight stitches looks exactly the same as the topstitching in the shirt. And don’t adjust your stitching beyond that – just leave your machine on that setting for the entire project.
And there you go! Hope that’s a bit of help – and just by following these simple rules on selecting and sewing shirts, you should have no problem creating a finished piece that rivals any ready-to-wear!
If anyone has any further questions on issues I didn’t cover, please leave them below in the comments section!
xoxox
Carly
Leave Comment
Aug 4, 2010 | DIY, From You
Can Carly ,I`m 16 years old ,I love fashion and I tried start to sew .I`m not very good and I ask you to post a DIY : how to make high waist shorts . Thanks you ,and sorry if I did some mistakes (my english is not perfect )=)
Leave Comment
Aug 3, 2010 | DIY

Louis Vuitton runway photos by Roberto Tecchio and Gianni Pucci, Style.com
That title was a mouthful!:-)
Rabbit-ears have infiltrated the fashion fray since Marc Jacobs threw them down the Louis Vuitton runway for Autumn/Winter 2009-2010. Though the black lace version has been donned and DIY’ed in numerous reincarnations since then, the scarf headband (with a little wire inside to hold its shape) is the grown-up version of this enduring trend. Take a favorite cotton handkerchief and make your own in a few simple steps right at home, and hop on outta there in style.

You Need:
(more…)
Leave Comment
Jul 27, 2010 | DIY
Uniform Project Picture Book from The Uniform Project on Vimeo.
watch the video above if you want to see the full year of 365 outfits Sheena styled.
As you guys probably noticed from an earlier post of mine, I’ve been following along with The Uniform Project for the past year.
Though more than once I’ve thought, “Gosh, why didn’t I think of that first?”, the idea for the site is pure genius. Raising awareness for a little to unknown cause through a fashion dilemma: how to style the same dress differently for every single day of the year. That’s 365 days, wearing the same garment daily.
Could you do it?
Besides also tying in to the concepts of eco-friendliness (same item in different outfits; stretching what you have to work in different situations) and charity – it’s an idea that hinges on the explosion in popularity of the street style blog and photo log. Plus, it’s FABULOUS marketing for the designer of the dress. Research and the theory of effective frequency has shown that a consumer has to be exposed to an image about 3 times before the ad is retained in the subconscious; and some time around the 12th-13th exposure the consumer begins to feel the product has value and begins to want it. (Though the rule of 13 was coined back in 1885 this idea is often still quoted today.)
The first time I saw the Uniform Project dress, I thought “basic little black dress; kind of cute but nothing too special.” The second and third times, I probably thought the same thing.
This is the new version of the dress available, in organic cotton + silk.
As I kept returning to the site and seeing Sheena’s myriad of styling methods for the same garment, over and over again, I began to want the dress. What an incredibly persuasive piece of subversive advertising!! (How many of you started to want this dress too?)
When it did finally go on sale I balked at the price [$150]. (I know, I do try to support struggling designers when I can, but I couldn’t really justify a purchase of the dress at that price.)
So when they also offered the PATTERN (for the new and improved U.P. Dress), I snapped it up. Yes, the pattern is a little basic and I could easily just purchase a similar pattern from the sewing store and alter it, but I did want to contribute to the cause of helping to send impoverished Indian children to school. And in meaner economic terms $20 is much easier to justify to myself (and Hub, since we share a bank account!) than $150.
I can’t WAIT until it arrives! Just in time for Fall. (As you can see, I vacillate between the selfless, heartfelt need to help those less fortunate and shallow, rampant consumerism. Yay!)
And you know what color I’m going to sew it in? Why, black of course!
I’m particularly unimaginative like that.
xoxox
Carly
Leave Comment