The Stayfree Comfort Factor: DIY Inspirational Quote Pillow Gives Me Comfort During That Time of the Month
 FTC Disclosure: This post is part of a paid campaign with Stayfree and BlogHer. All opinions are my own. To read my full Disclosure Policy, click here.
Ladies: who’s with me when I say I need a little extra comfort during that time of the month? We all know how it is during our periods: the cramping, aching, irritability, exhaustion, bloating, and general annoyance.  I tend to fall into a routine during this time: wearing loose, comfortable, non-restrictive clothing, indulging by curling up with an escapist book and a mug of my favorite Aveda Thé tea (with hints of peppermint and licorice root, yum!), and spending more time than usual just sitting on my bed to ease my aching back. I found also that doing a fun DIY project takes my mind of the general icky feeling that time of the month brings…and if it’s something that can also bring a little relief to my symptoms, so much the better!
 My kitty mug: a gift my grandmother Baba – the only grandparent I ever knew – gave me for my 11th birthday (now more than 25 years ago!). I treasure it and only save it for when I’m feeling really down.
 I’ve had this long lumbar pillow for a while (originally found at IKEA), and since I’ve been redoing my bedroom to add feminine pops of pink here and there, I felt like creating a brand-new pillowcase for it. Something beautiful. Something inspirational, that would motivate me beyond the blahs and get me to a better place mentally. Or just help prop me up when I feel like indulging in my tea + book combination. So why not a handwritten quote that I can look at and find motivation when I’m blue? It’s pretty easy to make your own, too. Here’s how: You Need:
piece of pink cotton fabric / white cotton fabric / pillow insert / invisible white zipper / sewing machine / matching thread / pins / fabric scissors / measuring tape / marking chalk / black Sharpie laundry marker
How To:  1. Measure your pillow and cut two pieces of fabric that are the measurements + 0.5″ all around for a seam allowance. I chose to use a patterned fabric for the back so my pillow would be reversible.
2. Cut a slightly smaller piece of the pink fabric.
3. Sketch the words on it with marking chalk. (It helps to place the fabric on something hard, like a cutting board, and use a piece of cut fabric as a guide to keep your words straight.) I just freehanded the words, using this picture as inspiration.)
4. Use a Sharpie to write the words and make it permanent. (I should have used a laundry marker, I realized, rather than a regular Sharpie.)  5. Pin the pink fabric to one piece of white fabric, centering it and folding under the raw edge.
6. Sew around the edge of the pink fabric to secure.
7. Make the two larger fabric pieces into a pillowcase by sewing the zipper to each piece with a 0.5″ seam allowance.
8. Open the zipper a small amount.  Flatten the piece right sides together with the zipper at the top, and sew all the way around the remaining 3 sides of the fabric.
  9. Turn right-side-out and stuff with your pillow insert. And that’s it! I could seriously stare at this quote all day: it helps snap me out of that “period funk” and gets me DOING things!
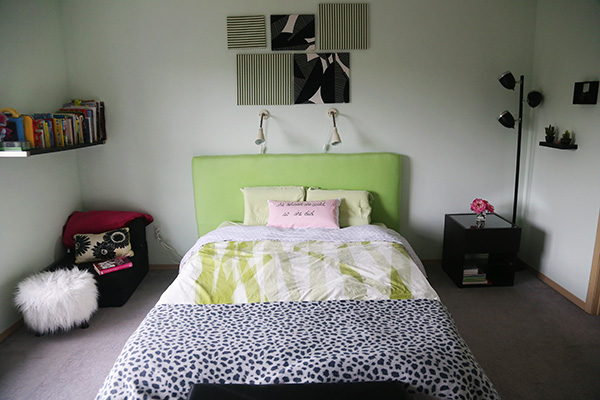 When someone says “Comfort” this is what comes to mind: my bedroom, filled with soothing tones of lush green with gorgeous pink accents, a downy comforter on my memory foam mattress, and my beautiful Quote Pillow, that reminds me that we women can do anything we set our minds to. And can never be stopped by our periods.
Inspired by high-performance fabrics, Stayfree® Ultra Thin® pads have flexible layers that move with your body and ThermoControl® technology to wick away moisture. So you’ll stay dry and comfortable. Stayfree.® Keep Moving.™ To get $0.50 off any Stayfree® product, including Stayfree® Ultra Thin® pads, visit www.stayfree.com/special.

Enter for a chance to win a $100 Drugstore.com gift card!
Leave a comment below letting me how you pamper yourself for a chance to win a $100 Drugstore.com gift card!
Sweepstakes Condensed Rules:
No duplicate comments. Your household may receive (2) total entries by selecting from the following entry methods:
1. Leave a comment in response to the sweepstakes prompt on this post
2. Tweet (public message) about this promotion; including exactly the following unique
term in your tweet message: “#SweepstakesEntry”; and leave the URL to that tweet in a comment on this post
3. Blog about this promotion, including a disclosure that you are receiving a sweepstakes entry in exchange for writing the blog post, and leave the URL to that post in a comment on this post
4. For those with no Twitter or blog, read the official rules to learn about an alternate form of entry.
No Purchase Necessary. This Sweepstakes is open to legal residents of the 50 U.S./D.C. age 18 or older (19+ in AL & NE). Void elsewhere & where prohibited. Winners will be selected via random drawing, and will be notified by e-mail. The notification email will come directly from BlogHer via the sweeps@blogher email address. You will have 72 hours to respond; otherwise a new winner will be selected.
The Official Rules, by which entrants are bound, are available here. This Sweepstakes runs from 8/11-9/11.
Be sure to visit the Stayfree brand page on BlogHer.com where you can read other bloggers’ posts!
Sweepstakes is sponsored solely by BlogHer. Energizer Personal Care LLC is not a sponsor. Sweepstakes is in no way sponsored, endorsed or administered by, or associated with, Twitter.
©2014 Energizer Stayfree and all other trademarks are owned by Energizer.
Bloggers were compensated for creating blog posts in this campaign.
 Now that the weather is warming up, I’m dying to redecorate my deck and patio in bold, fun colors. One of the easiest ways to infuse color into your outdoor decor is to craft up some pillows for your patio furniture.
  With Tulip tie dye, America’s Favorite Tie Dye, you can


 7. Place elastic band over pillowcase top, overlapping about 1/2″. Match pillowcase skirt center front to center of elastic band, and skirt center back to the seam you sewed in Step 6). Pin the two sides as well.

 Happy DIY’ing!


