May 18, 2016 | DIY
FTC Disclosure: This blog post contains affiliate links, which means I receive a small commission if you click through and make a purchase. My full Disclosure Policy is here.
And dare I add…sexy to the title?
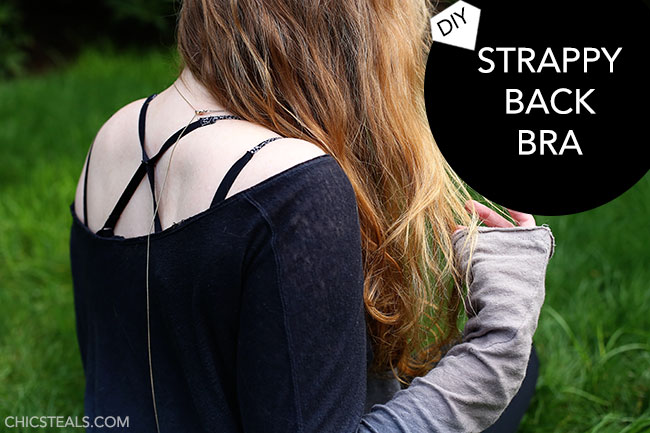
I’m sure you’ve noticed that a recent trend for the past couple of years has been lingerie (and swimwear!) getting more complex and strappy. Lots of extra ties, crossing strings, layered straps…I just love it! Bra straps peeking out from under a shirt are no longer risque; they’re trendy and cute. Welcome to the era of underthings that are meant to be shown…and this DIY takes any old bra you might have and upgrades it into the strappy bra trend. Get ready for some major sexiness with this project.
Many brands come already with tons of great strappiness. (Victoria’s Secret, Only Hearts, Free People, and One Teaspoon are particular faves.)
 I really liked this particular Victoria’s Secret bra (no longer available…but this is very similar) …but didn’t want to buy a whole new bra.
So what are you to do if you want a little sultriness but the lingerie you have needs a little upgrade? Add MORE straps of course! Here’s how:
You Need:
bra rings and sliders set / extra pair of bra straps (salvaged from a convertible or strapless bra, or bought as a separate item) / bra you don’t mind attaching the straps to permanently / matching thread / hand-sewing needle / pins / scissors
How To:


1. For the particular style I’m making, you have to cut off the ends of the bra straps. This bra had convertible straps, so I unhooked them and cut off the ends.

2. Thread both loose ends through a double-sided slider.

3. Now to create the upside-down V’s that will anchor each strap to the bra band. Take your two extra straps and cut off the ends. Thread a bra O-ring onto each. Pin down one cut end to the underside of the bra band, near the hook closure. (Note where the end is in relation to where the old straps connected.)

4. Pin the other end of the strap to the bra band, closer to the cups, to make an upside-down V on each side of the bra hook closure.

5. Thread the loose ends of the original bra straps through each O-ring. Fold the end of the original straps under and pin around that O-ring to secure.
6. Try on the bra to make sure all the straps lie correctly, and adjust the pinning if necessary. DO NOT CUT ANY STRAPS SHORTER until you’re ABSOLUTELY sure everything fits!

7. Once you’re sure you like the fit, now’s the time to sew. Trim the bra’s original straps shorter if necessary, and hand-sew each end onto the O-rings where you’d pinned.
 8. Stitch down the ends of the upside-down V straps to the bands (after trimming the excess). I made 2 lines of horizontal back-stitching for extra security.

9. Now everything’s secured and your bra is strappy (-er). I wanted to add yet another layer of strappy goodness…so I hooked the convertible straps I got from the kit I’d purchased to each original strap-anchor on the bra band.

10. Then, since my bra had a double strap attached to each cup, I snipped the end so I could separate them and work with the outer straps only. These I attached to the cut straps from Step 9.

If you don’t have a double strap, use the extra strap material to connect the O-rings to the tops of the cups with some stitching.

And that’s it!


It sounds terribly confusing, but it looks incredibly awesome once done (and peeking out from flimsy tops and low-back dresses ;-).

Happy DIY’ing! (and happy strappiness 😉
xo
Carly
Save
Leave Comment
Jul 18, 2012 | Score!

When I left the workforce to raise my son back in 2005, I traded in my suit jackets and button-down shirts for a wardrobe of T-shirts, sweatpants, and sports bras. That became my uniform for the next 6 and a half years, and in the interim I moved to suburbia, lost a huge amount of weight, gained all of it back slowly, saw the U.S. hit one of the most severe economic depressions in history, and lamented ever rejoining the workforce again. Even though in 2008 I began blogging from home about fashion and budget-shopping, my weekly roundups of must-buy clothing and accessories were more aspirational than my everyday reality.
In 2010 my son was in school full-time, so I began applying for jobs in my field locally. And applying and applying. Nothing happened, and I decided to switch tactics and go back to school to improve my skills, to network, and to hopefully land an internship.
Finally, in June of this year, I got that coveted internship at a production set and design studio. Now I’m back to suit jackets and button-downs, though this time around my jackets are flower-patterned, my button-downs accessorized with vintage rhinestone necklaces, and sometimes even a T-shirt is acceptable work attire. I now work in a very creative field, where expressing one’s personality and being on-trend is tantamount because it speaks volumes about how “current” your knowledge is, as well as your taste level.
Before: My work attire, sports bra underneath.
So now I need foundation garments that are appropriate for work – and not just for working out, as before. I’ve lost and gained enough weight since being pregnant that my bra size has fluctuated dramatically, and though I’ve gotten used to the snug feeling of sports bras, they don’t look too professional, they mash my shape, and the wide straps often show under boatneck tops.
Lily of France sent me two of their bras to try out so I could see if they worked better for my new work wardrobe: the Extreme Push-Up Underwire in black with gray dot edging, and the Extreme Options in black.
Extreme Push-Up detail shot.
The fact that they’re both convertible (and the Extreme Options is convertible 62+ different ways!) is incredibly helpful and means that they can take the place of multiple different bras in my lingerie drawer. This means either can be worn under a variety of clothing, from sleeveless dresses to boatneck tops to bustier dresses. Plus, they’re both generously padded, which gives my poor sagging chest (after baby, ahem) a much-needed boost and myself a much more feminine figure. I’ve gotten to an age where I am now embracing my figure, so I prefer to accent the little I have on top to balance out the generous amount I have on the bottom. 😉 It’s incredible how much the Extreme Push-Up lifts and boosts my A-cup into at least a cup and a half larger, which makes me feel way more feminine for date nights with my Hubby and helps me fill out all of my fitted sheath dresses properly.
After: Wearing Lily of France Extreme Pushup bra.
Style Tips for Dressing in a Creative Field:
*Even if it’s creative, a workplace where a visible bra is okay may not be too common. Always err on the side of being covered up rather than being a slave to fashion. And always wear a dark bra under a dark top, a bra matching your skin tone under a white top, and a nude camisole underneath a sheer top.
*It’s totally okay to wear undergarments that give you a “womanly” shape. Even in a male-dominated field, you are who you are, so there’s no reason to try to hide or pretend to be less. Choose undergarments that play up your assets. (Just keep the cleavage under wraps to stay appropriate!)
*If you work somewhere that has a fairly lax dress code, still try to take it to the next level and dress up a little bit: a blazer over your t-shirt, a statement necklace over a tanktop, low heels with fitted trousers, etc. Making that extra effort shows you care about that job and the image you project.
*Add something to your outfits that is your personal signature: your favorite bracelet, some nice stud earrings, even a specific color of nail polish. The more “identity” you show in what you wear, the more it will become your creative calling card!
So, to help someone out there kickstart her workwear-appropriate lingerie drawer, Lily of France has graciously partnered with Chic Steals to offer a $100 Visa gift card to one lucky reader!
(Actual card received may differ from version shown.)
 How to Enter
Choose 2 of the following entry methods:
a) Visit the Lily of France website and leave a comment on this post in the comments section telling me which bra you like the most (NOT in the Facebook comments box or through Facebook)
b) Tweet about this giveaway and leave the URL to that tweet in a comment on this post
c) Blog about this giveaway and leave the URL to that post in a comment on this post
d) For those with no Twitter or blog, read the official rules to learn about an alternate form of entry.
Total entries allowed per person: 2
Also: No duplicate comments. Any comments left through the Facebook comments box or on Facebook will not be counted. All comments must be left on this post on my blog.
This giveaway is open to US Residents age 18 or older. Winners will be selected via random draw, and will be notified by e-mail. You have 72 hours to get back to me, otherwise a new winner will be selected.
The Official Rules are available here.
This sweepstakes runs from 7/18 to 8/15/2012.
Be sure to visit the Lily of France brand page on BlogHer.com, where you can read other bloggers’ reviews and find more chances to win!
Good luck to everyone!
xoxox
Carly
FTC Disclosure: This is a paid post with BlogHer and Lily of France. I was sent 2 bras from Lily of France to review. ONE $100 VISA gift card will be sent to the winner of this giveaway. For more information, see my Disclosure Policy.
~Share this giveaway with your friends!~


Leave Comment
Jul 25, 2010 | DIY, From You, Life
from formspring.me:
Hey I wondered if you could help me with making one of these “bralets”, do you know how to make a pettern for them? http://api.ning.com/files/zcwHPg1VgsLUzsS1e99DsdD4ZlRqQdct0bCSs9*1rseLJIAKirKx55a0ARHDEJCLVDBdi8fpp9Gn0zIw37Jm5Vb-jsk5K1bz/bralet.jpg
Leave Comment
Jun 5, 2010 | DIY, From You
From my formspring.me inbox:
Love your blog! Advice on how to DIY this elastic savant bralette? https://www.idontlikemondays.us/Merchant2/inventory/savant_bralette_am.jpg Can’t imagine paying almost $200 for this!
The basic idea is you just pin the elastic onto your dress form, keeping the elastic taut but not *too stretched.* If you don’t have a dress form, then enlisting the help of a friend would be great, and pinning it onto a tight-fitting tanktop that you are wearing. Then, pull off the piece, and stitch down the connections on your machine using a regular stitch (not a stretch stitch) in black thread. It doesn’t even need a closure since it is elastic!
Best of luck – and you’re definitely right – $200 is way, way too much for some elastic!
xoxox
Carly
Leave Comment


