It’s officially Party Season (TM) – and that means glittery, festive, fun, loud, joyful celebrations!
 I really love making my own party hats (or putting children to work making party hats 😉 ) because they’re easy, cheap, and I can make them to completely coordinate with the party theme. Plus I can make them from scraps lying around! Perhaps you’ve never tried making your own, maybe because you don’t have time or it seems like a pain. But you may find that once you get [that party] started…you can’t stop! Now, let’s all hum that tune as we head on down to the how to…
How to Make a DIY Party Hat from Cardstock and Ribbon
You Need:

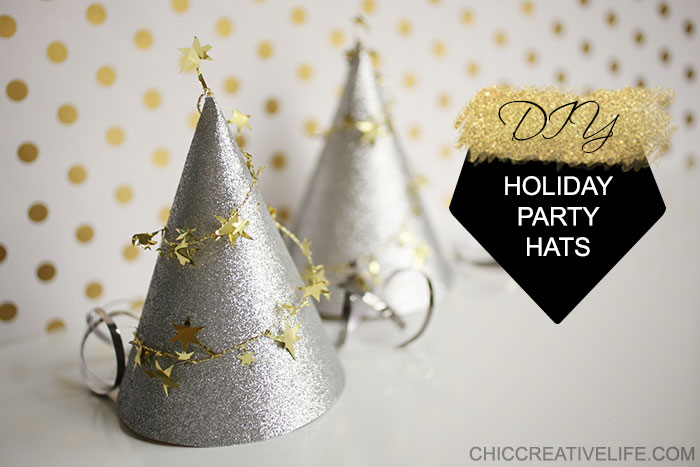
8.5″ x 11″ cardstock // Party Hat Template (click to download the PDF) // tinsel garland (I found this star version at Michael’s) // ribbon (not pictured – I used silver curling foil wrapping ribbon) // pen // scissors // stapler // box cutter // tape (not pictured)
How To Make a DIY Shooting Stars Party Hat:

1. Trace Party Hat Template onto the back of your cardstock.

2. Cut out the template from the cardstock. Use the box cutter to slice where indicated.

3. Curl the cardstock into a cone shape, and slip the edge tab into the slit you cut. Secure with some tape on the inside.

4. Thread one end of the ribbon into one of the small slits at the base of the hat.

5. Secure with tape, and then cut to desired length. (Make sure that it’s long enough to tie under your chin!) Do the same for another piece of ribbon and the other side of the hat.

6. Now the fun part: decoration! Staple the garland to the bottom of the hat.

7. Twirl the garland around the cone hat, securing with staples if necessary. At the top, twist downwards and tuck into the hole at the top of the hat. Secure with more tape on the inside.

And that’s it! It will take you less than 5 minutes tops – with a fun and unique party hat!


Have a Happy New Year’s, everyone! I just love a glittery beginning!
xo
Carly


Wow. Incredible Eve party ideas. Thanks a lot for sharing with us. Wish you best of luck for 2018.