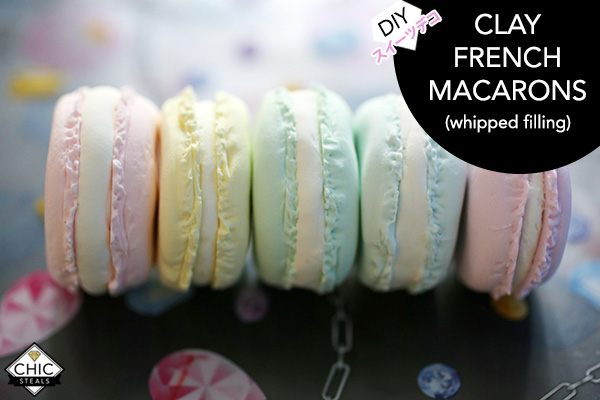
 Who isn’t obsessed with French macarons lately? They seem to be everywhere: flooding Pinterest, on inspiration boards, in recipe guides, and all over Instagram. Though I love love love the real ones as an occasional indulgence, sometimes I want to have some around as sweet little objets d’art, and as the basis for another fun craft for Valentine’s Day I have coming up.
 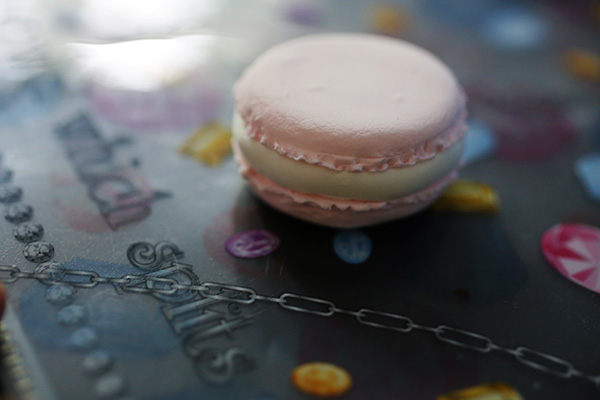 They could also be used in jewelry and accessory projects too! (More on that later.) In the first of my series on Japanese-inspired Deko Sweets, here is how to make your very own (extremely realistic!) pastel-colored French macaron out of clay:
You Need: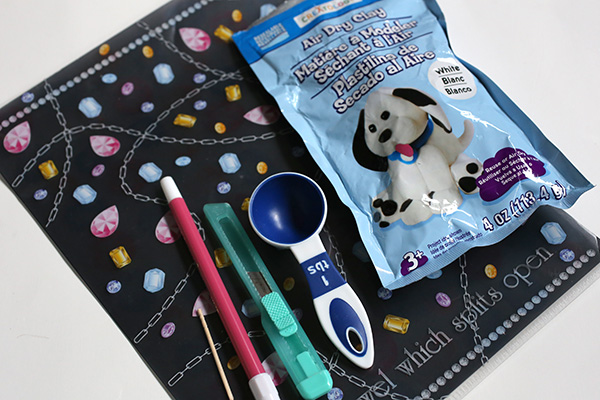
white air dry clay / water-based colored markers / X-acto knife / tablespoon / toothpick (preferably not one that you use for food) / silicone or plastic mat (I just use a plastic file folder)
How To:
 1. Pull off a small piece of white clay, about the size of a golf ball.
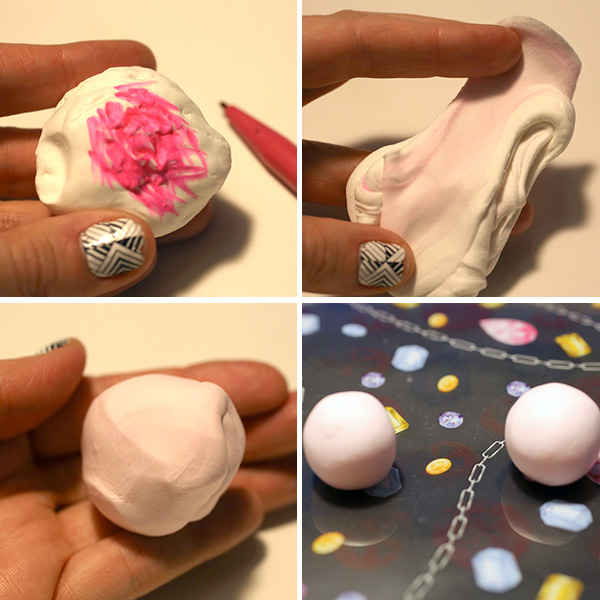
2. Scribble on the clay with the marker.
3. Knead to distribute the color, which will turn into a pretty pastel as it mixes with the white clay. Add more dabs of marker, kneading until you’ve reached the color you want.
4. Form into 2 balls about the same size.
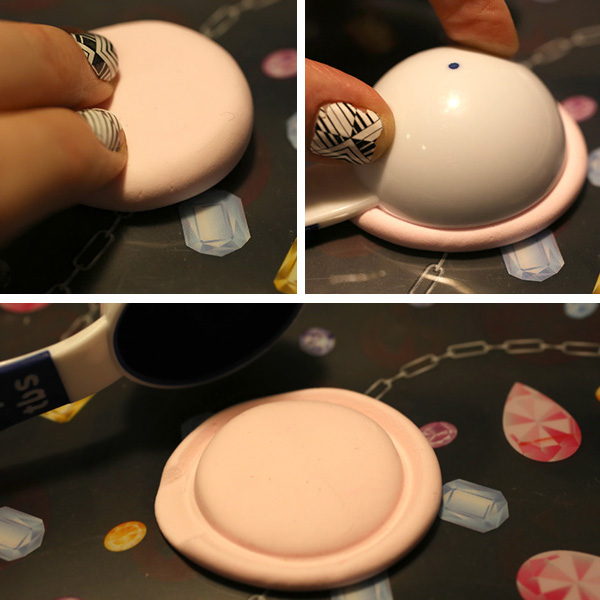 5.Flatten one ball into a disc onto the mat.
6. Use the tablespoon to press down onto the disc, leaving an impression of the edges.
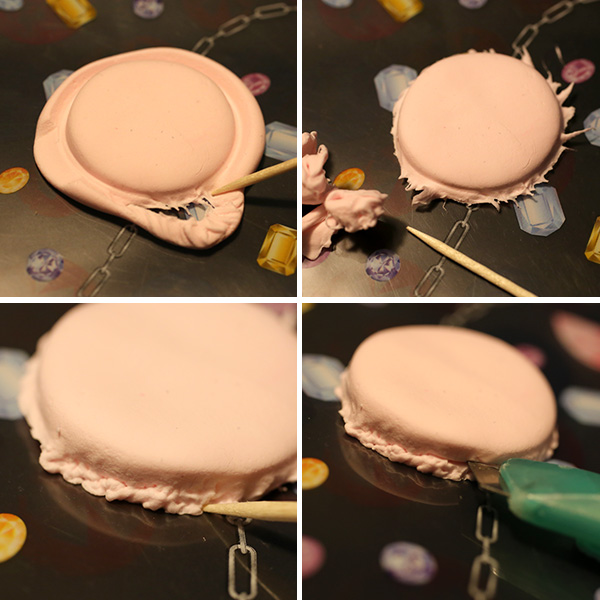 7. Rip away any excess clay around the edges (do this haphazardly), using a toothpick.
8. Use the toothpick to stab and poke the jagged edges of clay around the bottom of the macaron, pushing the clay back into itself and cleaning up the jagged edges.
9. When you’ve gone all the way around the edge, use an X-acto blade just above the pokes to make short, shallow cuts. Do this all the way around the macaron.
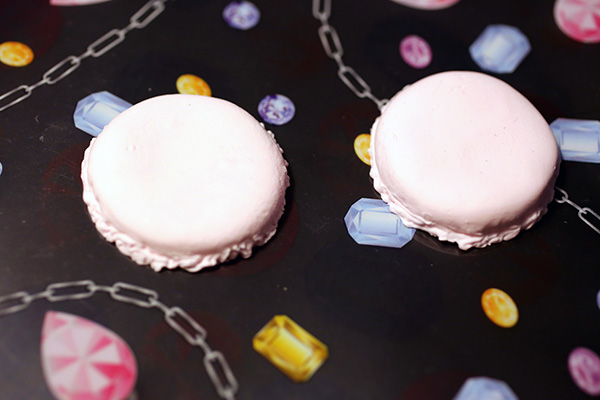 10. Repeat for the other ball of colored clay.
11. Allow to dry at least 24 hours before handling. If you can, try to peel off the mat before 3 days passes so that the bottom centers will still be soft.
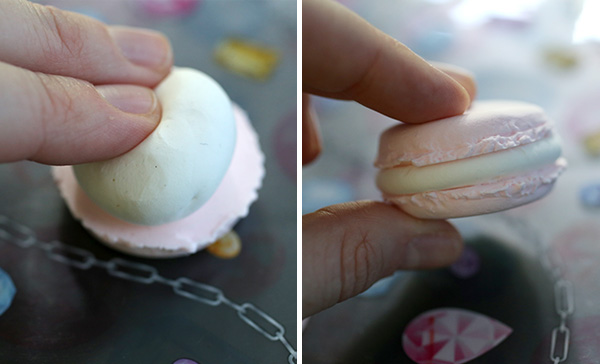 12. Take a much smaller piece of white clay and form into a ball. Place between the two macarons you made to create a whipped cream filling, and press the two halves together.
13. Allow everything to dry about 3 days.
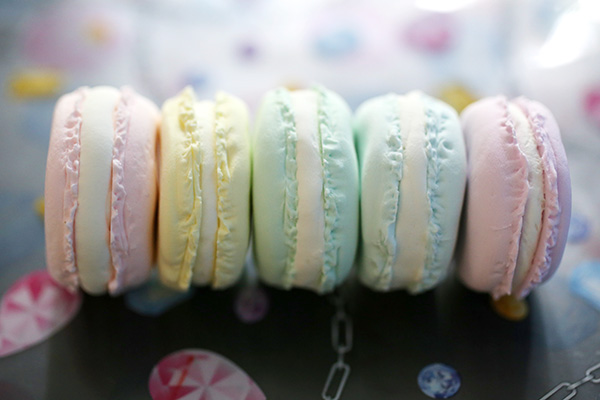
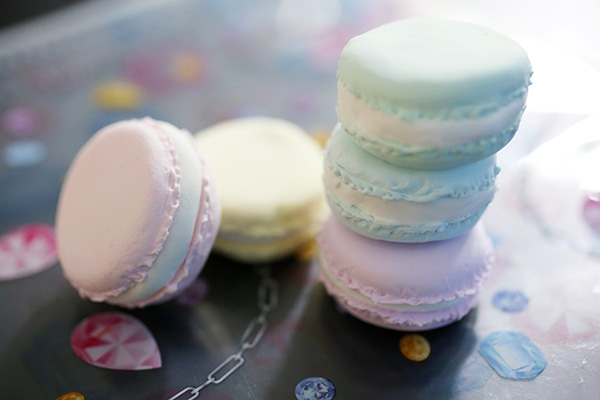
And that’s it! You can make any color macarons you want with just switching up your marker color (and this is a fun little craft for kids too!)
 Mmmmmmm….they look good enough to eat!
 Check back later this week for a DIY tutorial that uses these for a cute little object for your desk, or as a wonderful gift to that special someone. Stay tuned!
 Happy DIY’ing!
xo
Carly


This is so awesome! I have plenty of air-dry clay I cannot wait to use to make some!
Thank you, Lia! The air-dry clay creates a very light and fluffy macaron (just how they’re supposed to be, haha), and you can make them any color just by scribbling on the clay with markers and mixing! Have fun 🙂