 Welcome to Day 2 of my 1 Week of Halloween DIY! What’s representative of Halloween no matter where you go? PUMPKINS! And today I’m going to share with you a simple DIY to jazz up pumpkins (the faux kind, which means you can use them year after year 🙂 With a couple of stencils it is super quick and easy to make these – and you can truly customize them however you like. Here’s how:
You Need:
white faux pumpkins (I used both medium and large sizes for the 3 I made) / painter’s masking tape (not pictured) / adhesive stencils (see below for stencils I used) / paintbrush / craft paint (see below for exact colors) / something to protect your work surface / silver marker (not pictured)
How To:
PUMPKIN 1: HALF NIGHT SKY
(paint colors used: Martha Stewart Crafts Beetle Black and Meadowlark; stencil used: Martha Stewart sickle moon)
1. Tape off the bottom half of the pumpkin with painter’s tape.
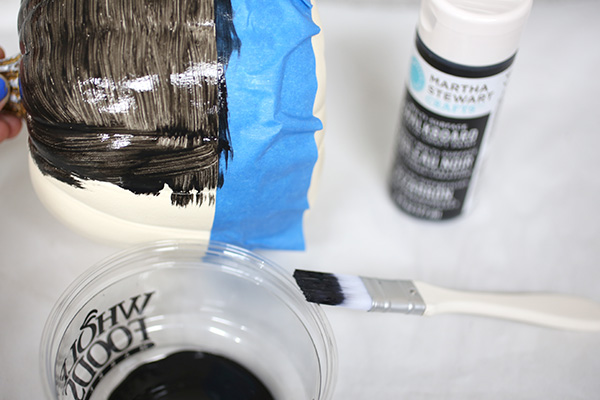
2. Paint the top half of the pumpkin black. It took me about 2 coats to get a solid black, allowing to dry in-between.


3. Places the sickle moon stencil on the pumpkin. Use Meadowlark (yellow) paint, applying in a dabbing motion. Peel off the stencil while the paint is still wet.

4. Use a silver marker to dot on stars to fill up the black. Allow to dry.
PUMPKIN 2: COLORED BATS
(paint colors used: Martha Stewart Crafts Adobo, Golden Beryl, and Black Nickel; stencils used: Martha Stewart large bat and medium bat) 
1. Apply the large bat stencil to the pumpkin, and dab on Black Nickel paint. Peel off the stencil while still wet.
2. Apply the same stencil in a pattern around the entire pumpkin. (It helps to wipe off the underside of the stencil before placing it again on the pumpkin to prevent paint leaks.)
3. Repeat the process for the medium bat stencil, using Adobo (orange) for those ones, and filling in any large spaces in the pattern.

4. Use Golden Beryl (green glitter paint) to brush onto the pumpkin stem. Allow to dry.
PUMPKIN 3: MESSAGE DRIP PUMPKIN
(paint colors used: Martha Stewart Crafts Beetle Black and Adobo; stencil used: Martha Stewart Happy Halloween)
1. Repeat Steps 1 & 2 from Pumpkin 1.
2. Apply the black paint in thick globs in the ridges of the pumpkin, which the pumpkin is sitting on a flat surface. The paint will drip down, and dry while it is halfway down the sides.
3. Adhere the Happy Halloween stencil, and apply Adobo (orange) paint to it, peeling off while still wet. Because it was a skinny font, I also went back with a thin paintbrush and touched up where the paint had leaked or smudged.
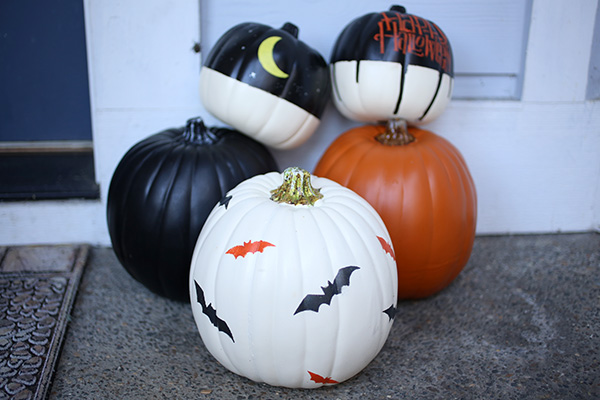 And that’s it! Hope you guys have fun customizing your own pumpkins – me, I like mine stacked in a pile, but get creative with your display and enjoy!

If you like the DIY Dollar Store $4 Fall Leaf Wreath in the photo above, I shared the tutorial here.
 Happy DIY’ing!
xo
Carly
FTC Disclosure: I received a box of craft supplies from Martha Stewart Crafts for a paid post (posted here). This post was not part of the paid campaign, and I was not compensated for this post. All opinions above are my own. For my full Disclosure Policy, click here.


I love it!!! Halloween is the best part of the year in my opinion!:) I really like the wreath as well, you should do a tutorial on that too!:)
Dom
Thank you Dom! I just love Halloween too:-) And I did do a tutorial on the wreath awhile ago; it is here. Hope that helps!