Mar 30, 2015 | Fashion
 I have a love/hate relationship with Target…well, really more like LOVE since I can’t go into one without filling up my shopping cart with amazing, affordable finds. Like these, for example.
1. Hamilton X-slat Desk / 2. Mirrored Pyramid Living Room Accent Table / 3. Vase Target Glass 8 in / 4. Nearly Natural Artificial Arrangement – Beauty / 5. Room Essentials Magazine File / 6. Deny Designs Decorative Three of the Possessed Crystal Crush Wooden Tray / 7. Steven Mirror in Silver / 8. Element Touch Lamp / 9. Threshold Ikat Dots Pillow / 10. Xhilaration Ruffled Decorative Pillow
And BTW, Target is running a GREAT promo from now until 4/4/15:
Spend $75 and save 15% on Home items – Plus get an extra 10% off when you use promo code MOVINGDAY at checkout!
I actually picked up the above gorgeous Hamilton X-Slat desk (to use as a vanity table in my bedroom!) for a sa-WEET $99 after all the discounts…and I’m pretty thrilled with the quality (and the styling possibilities!)
And don’t forget to use that Cartwheel App to save even more on already-reduced merchandise!
xo
Carly
FTC Disclosure: This post contains affiliate links, which means I make a small commission if you click and buy something through one of the links above. My full Disclosure Policy is here.
Leave Comment
Feb 12, 2015 | DIY
The big V-day happens to be Saturday this year, and it’s now a countdown to what to get, what to make, how to profess your undying love to the one true person in your life. Here are a couple ideas from my archives if you need something to make last-minute:
 DIY Ombre Typography Pillows
 DIY His and Hers Leather-Bound Book Necklace/Keychain
 DIY French Macaron Stack Card Holder Memo Stand
 DIY Patterned Silver Leaf Photo Frame

DIY Faux Geode Quartz Paperweight
 DIY Healthy Natural Coconut Oil Stick Deodorant

And, from a previous year: 15 DIY Valentine’s Day Gifts for Everyone.
 And, if you’d prefer not to give a THING but instead perform an action and make it a memorable experience instead: Romantic Ideas You Can Do At Home for Valentine’s Day Infographic
And, for those wanting to celebrate their singledom, here are a couple great ideas for you too!
7 Single Gals Valentine Day Ideas
xo
Carly
Save
Leave Comment
Jan 20, 2015 | DIY
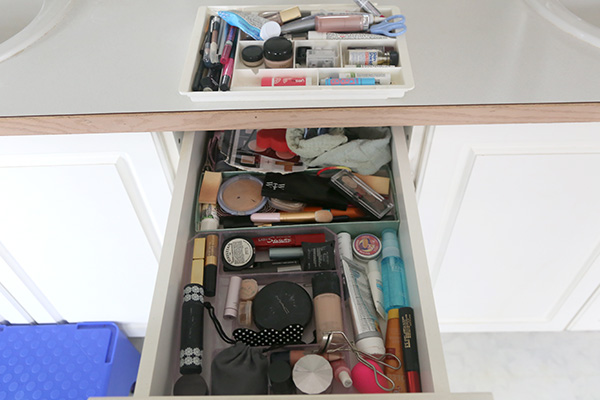
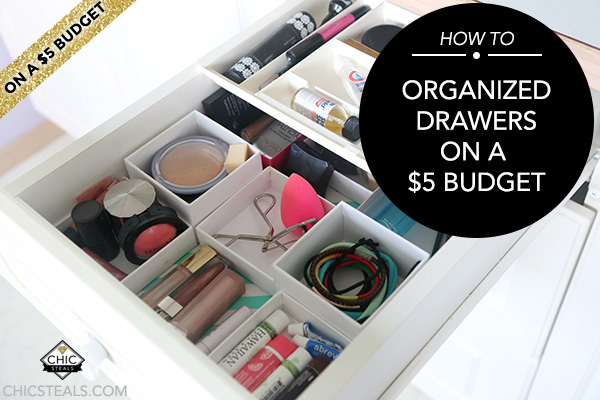 I love love love organized drawers. When you open them, every item in its proper place, catalogued and corralled, and I just can’t help but smile. Who wouldn’t love to be able to find everything you need, right at your fingertips? And don’t get me started on the kind of heaven that The Container Store is for me. Yup, I love organized drawers – but doing so can be kind of pricey if you spring for brand-new containers and liners and the like. With a little bit of planning ahead, you can clean up all your dirty secrets – for around $5. Here’s how:

Before: Quelle horreur!
You Need: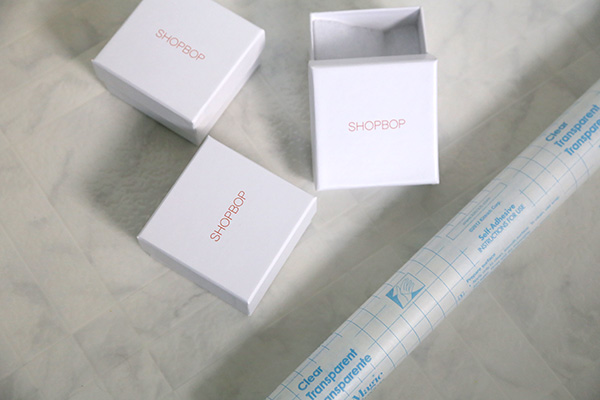
clear adhesive Con-Tact Shelf Liner * / your favorite wrapping paper* / measuring tape / double-sided tape / scissors / pen / extra jewelry boxes, shipping boxes, or other small boxes
How To:
*You could always skip using these two items and just purchase a 2-for-1 like Chic Shelf Paper. They have a lot of great designs, plus they have a waterproof option for the linings of bathroom or kitchen cabinets, which need to withstand moisture on a daily basis. It is a little pricey, so I went with some wrapping paper I liked (which affords you endless possibilities) from Target (Spritz, in teal chevron) and Con-Tact paper, which is cheaper.
1. Remove all your stuff from the drawers and lay it out. Purge ruthlessly! Pile stuff into a pile of things you need every day and need immediately at hand.
2. Clean out the drawer by wiping it down of debris and dust. Makeup remover and nailpolish remover can be godsends to get crusty makeup spills out of the bottom.
3. Measure inside of drawer and cut a piece of wrapping paper the size to fit.
4. Peel the backing off the Con-Tact paper and place it sticky side up on a flat surface. Adhere the wrapping paper piece to it carefully by turning it upside down, so the patterned side is stuck to the sticky side of the Con-Tact paper. Smooth out any bubbles.
5. Trim the Con-Tact paper to the same size as the wrapping paper piece.
6. Place in the drawer, securing with double-stick tape to the inside of the drawer.
7. Try your jewelry boxes (and lids!) in different configurations until you find something you like. You could optionally spray paint the insides a contrasting color (or add some glitter – woohoo!) but I preferred the white.
8. Use double-stick tape to secure each box down to the Con-Tact sheet, and to each other (where needed). I decided to let some spaces in between the boxes so I could see the Con-Tact paper showing through.
9. Re-fill your now sectioned and organized drawer, paying attention to how you use it and what you need to grab immediately (which would go in the front or top – the easiest-to-reach places).
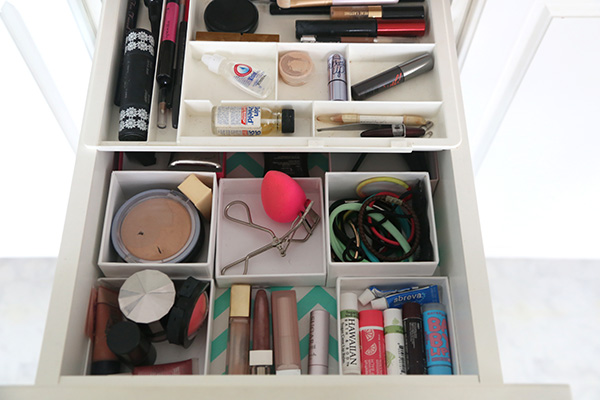 You’re done! Revel in your newly-organized drawer, and breathe a sigh of happiness every time you open it.
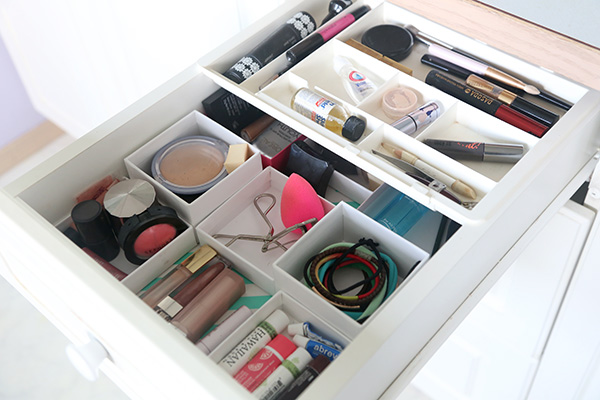


From the above…

To THIS!!
And one more time, a side-by-side Before and After…
Happy Organizing!
xo
Carly
Did you like my $5 Budget tip? Leave your ideas for another one you’d like to see DIY’d in the comments!
Save
Leave Comment
Nov 24, 2014 | By Carly J. Cais, DIY

 Now with the holiday season nigh, the air is filled with rich, cozy scents reminiscent of home, family, and years past. Glade has come up with a Limited Edition Winter Collection of fragrances, encapsulating all that is wonderful about the season, including one of my favorites, Sparkling Spruce.
 (more…)
Leave Comment
Oct 28, 2014 | DIY
 I LOVE me some freeform, rough-hewn, organic-looking ROCKS lying about the house as home decor (and I’ve been a rockhound for as long as I can remember!). Now it’s particularly fashionable to have some large geode chunk or quartz piece sitting on one’s desk or bookshelf (which looks extremely high-end and chic…just ask Mitchell Gold + Bob Williams). But unfortunately these large hunks of rock just cost so darn much, they’re more an investment piece than something you can just get your hands on easily. I decided to go the DIY route, and make my own version of this ubiquitous geode decor – and use it as my own freeform paperweight for my desk. Plus, it’s waaaaaay cheaper than you might think! (Especially when you have some leftover quartz from other projects, like my DIY Free People Quartz Wrapped Bangle and DIY Free People Gold-Dipped Quartz Necklace.)
  Here’s how to make your own:
Materials:

polished quartz chunks (get yours from a rock shop in bulk…I got mine from Ed’s House of Gems in NE Portland) / plastic lid with a lip / Weldbond Adhesive (or other glue for rocks) / clear beach glass (found in the floral section at the craft store – it’s used as vase filler) / gold gilding liquid and brush (optional) / rubber bands (optional)
How To:
 1. Start by placing your beach glass pieces and favorite quartz pieces into your lid to create the base of the piece. Fit as many as you can so that they are stable on the lid. It’s best to vary the shape and size of the pieces, and mix the polished quartz in with the matte beach glass.

2. Once you’re satisfied with the arrangement, pick every other piece up and carefully add some generous glue along the edges where it touches the other pieces. Some you’ll pick up, others you won’t, but in the end you want all the pieces to have glue along their touching edges. Allow the base to dry.

3. Once the base is sturdy, spread a large amount of glue in all the crevices and gaps [the glue I chose dries clear]. Press stones into the gaps to fill out, paying attention to the overall shape and making it rough and organic-looking like a real geode would be.
4. Allow to dry. You may have to repeat this process a few times until you have built up the top of the piece, since each layer may get too heavy with rocks and they start sliding off before the glue has dried. Finish with a top layer mostly of quartz piece and allow to dry.
5. (not pictured) To make it look like a true rough-hewn geode piece, once dried flip the piece over and glue rocks to the bottom of the base so the base isn’t so perfectly round and the shape of the lid itself. Rubber bands can hold these pieces of rock onto the base until everything is dry.
6. (not pictured) If you so desire, you can give the bottom of the paperweight a layer of liquid gilding…I totally would have, except the lid to my gilding was fused closed and no amount of wrenching would get it off. So I decided the finished paperweight was better without the gold!!

And that’s it! Even though it’s technically just glass and quartz glued together…one would be very hard-pressed to actually figure out that it wasn’t just some cool-looking rock formation. 

(P.S. – the beautiful tea roses in the vase are actually one of my favorite Joss & Main purchases! I love their faux florals; these ones are the soft-petaled super-realistic ones.) Plus, the whole project cost me a total of $12.99 ($9 for the bag of quartz, which I had already used for other DIY’s…and $3.99 for the beach glass from Michael’s). I already had the Weldbond at home!
That sounds like a super-bargain, no?!
Hope your office or shelf looks snazzy and lovely with this chic and cheap upgrade. Happy DIY’ing!
xo
Carly
Save
Leave Comment


