May 27, 2020 | DIY

This post contains affiliate links – and I receive a small commission on sales from readers clicking through these links. My full
Disclosure Policy is here.
Quick Links from Photo: 1 / 2 / 3 / 4 / 5 / 6 / 7 / 8 / 9 / 10 / 11 / 12
So far on this site I’ve shared my Must-Have DIY Tools for Sewing, Embellishing, and Jewelry-Making. Here is my roundup of the must-have tools for DIY Shirt Makeovers:
Tools for DIY Shirt Makeovers
1. Seam Ripper
You.Must.Have.A.Seam.Ripper. You need it to remove buttons and take apart shirts to be cannibalized, to fix stitches…this is vital to prepping your shirt for a successful makeover.
2. Awl
Though not completely necessary (I often use my nail scissors or metal rod from my Turn-It-All ), an awl is a very helpful tool for creating perfect holes, and using as an extra finger to keep fabric down as you feed it under a moving machine needle. I’ve saved many a finger with this!
3. Chalk Pencil
This marking pencil is my absolute favorite since it makes super-precise lines and works just like a mechanical pencil. LOVE.
4. Tape Measure
Or is it “measuring tape…?” I never can settle on how to refer to it! In any case, having a flexible measuring tool is essential for measuring yourself and ensuring a perfect fit as you makeover your shirt. I don’t recommend the cheap paper kind – get yourself a nice one made out of soft vinyl that will not get twisted with use.
5. Sharp, Sharp Sewing Scissors
El-cheapo scissors won’t cut it (literally)! Prepare to spend around $30+ for an excellent pair of Gingher or Singer scissors, and they will last you a lifetime. (Just never, ever, EVER cut anything else besides fabric with them [especially paper]…which will dull them like nobody’s business.
6. Sharp, Sharp Pins + Emery-filled Pincushion (or strawberry)
I’ve found that certain “decorative”-style pins aren’t all that sharp, and the round-headed ones tend to cause bumps when pinning a pattern to fabric in order to cut. I prefer the extra-sharp flower-headed pins so the pattern isn’t puckering and lifting, and they don’t get in the way of the machine foot so much. Plus an emery-filled pincushion/emery strawberry to keep them all corralled and sharpen them is a must!
7. Sewing Machine
I use a Kenmore 16231, and it’s a real workhorse! I had a Kenmore my mom and I used while I was growing up, and I just stuck with the brand. Even with the amount of sewing I do, it really wasn’t necessary to get anything super-expensive! – and it’s held up great since 2009.
8. Iron
This is another MUST in creating successful projects – the iron will turn hems, set seams, and give everything a crisp and professional look. You don’t need anything fancy, just a basic off-brand one will do.
9. Ironing Mat
Though I have an ironing board that I photograph on, I find myself using my ironing mat on a hard surface far more. It’s portable, light, heat reflective, and it’s much less clunky and space-consuming than a standard ironing board.
10. Curved Nail Scissors
I love love love these scissors! (They also appear on my Must-Have Tools for Jewelry DIY’ing list…that’s how much I love them!) They work great as thread snips if you don’t feel like investing in those, and help you poke holes and cut perfect buttonholes (just be careful of the curved edges).
11. Poly-Cotton Mercerized Thread
This is the stuff sold everywhere, that you want to use to sew your shirt makeovers with. Make sure you get poly-cotton mercerized (even though your shirts will likely be cotton), as poly-cotton is stronger and less prone to breakage and fraying. “Mercerized” means it’s been treated to be stronger and have a slightly shiny appearance.
12. Sewing Machine Needle Pack
A standard 90/14 needle will do just fine for the majority of shirt makeover projects, but for different fabrics I like to have a needle variety pack on hand just in case.
And check out my DIY Resources page for more lists of resources to up your DIY game!
xo
Carly
Leave Comment
May 11, 2020 | DIY
This post contains affiliate links – and I receive a small commission on sales from readers clicking through these links. My full
Disclosure Policy is here.

After 12 years of running my own sewing, crafting, and DIY blog, a lot of people ask me how they can improve their sewing skills. Many people want to know where to start, what to do next, what skills are essential, what skill do they need to add to their repertoire, etc. (Even after all this time there are some things I STILL don’t do well when it comes to sewing, and I’d prefer to focus on the essential skills that can make me a nice-looking outfit day in, day out.)
The cool thing is that ANYONE can get good at sewing through progressive practice – and it doesn’t take a lot of practice to sew a sturdy, good-looking garment! It’s a good idea to start simple and build your skills by tackling projects that, in succession, will teach you a new skill with each project, so you can build on your knowledge and abilities.
Here is my recommended sequence for anyone to improve your sewing skills:
7 Projects to Improving Your Sewing Skills
- A Pillow (New Skills: Measuring fabric, sewing in a straight line, trimming seam allowances, making perfect square corners, hand-stitching a seam closed)
- Simple Pull-On Top (New Skills: Taking your measurements, cutting pattern pieces, finishing seams for wearables)
- Simple Pull-On Elastic Skirt (New Skills: Cutting an elastic waistband, creating a fabric casing, sewing an elastic waistband)
- Keyhole Top with Gathered Sleeves
 (New skills: Creating bust darts, setting a ruffled sleeve, creating a keyhole closure, adding a button)
- Lined Skirt with Zipper (New skills: Creating darts, setting an invisible zipper, creating a lining)
- Pocket Sheath Dress with Zipper (New skills: Finishing a blind hem, creating side pockets, adding a hook and eye closure)
- Pants with Waistband (New skills: Creating a curved crotch, notching curves, creating a front zipper with placket, interfacing a waistband)
Though we don’t get into jackets (and jacket linings!) just yet, the above is a solid way to flex your sewing abilities, polish those skills, and brush up on your construction techniques. Let me know if this helps you improve your sewing skills in the comments!
xo
Carly
Leave Comment
Apr 22, 2020 | DIY
This post contains affiliate links – and I receive a small commission on sales from readers clicking through these links. My full
Disclosure Policy is here.
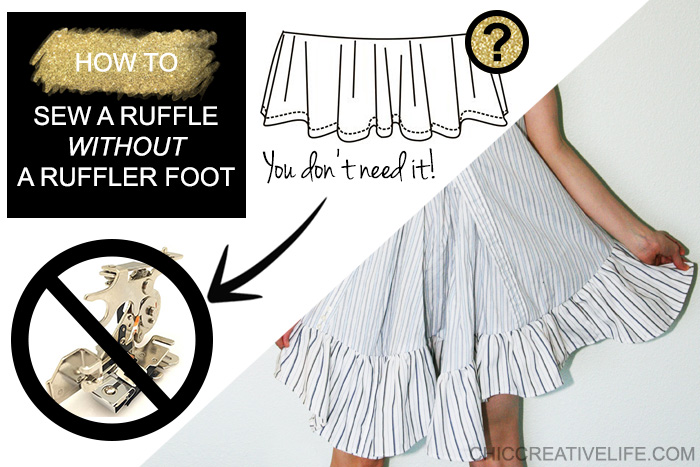
I just LOVE ruffles – and always struggled how to sew a ruffle since I didn’t have a ruffler foot for my sewing machine. (Those things are expensive and complicated, man!) Though I eventually made the plunge and bought a ruffler foot sewing machine attachment, I can seriously count the number of times I’ve used it since then on one hand! I simply prefer a quicker, easier way to make picture-perfect ruffles – that is completely adjustable to my garment – and comes out great every time. Plus, ruffles are so IN this Spring & Summer for 2020 – check out the pattern trends for McCall’s Patterns for example – and a lot of my DIY’s use this method, so I figured it was high time to walk you through how to make them! Ruffles look so pretty especially using shirting fabric – and they’re amazingly simple to make using this method.
How To Sew a Ruffle Without a Ruffler Foot
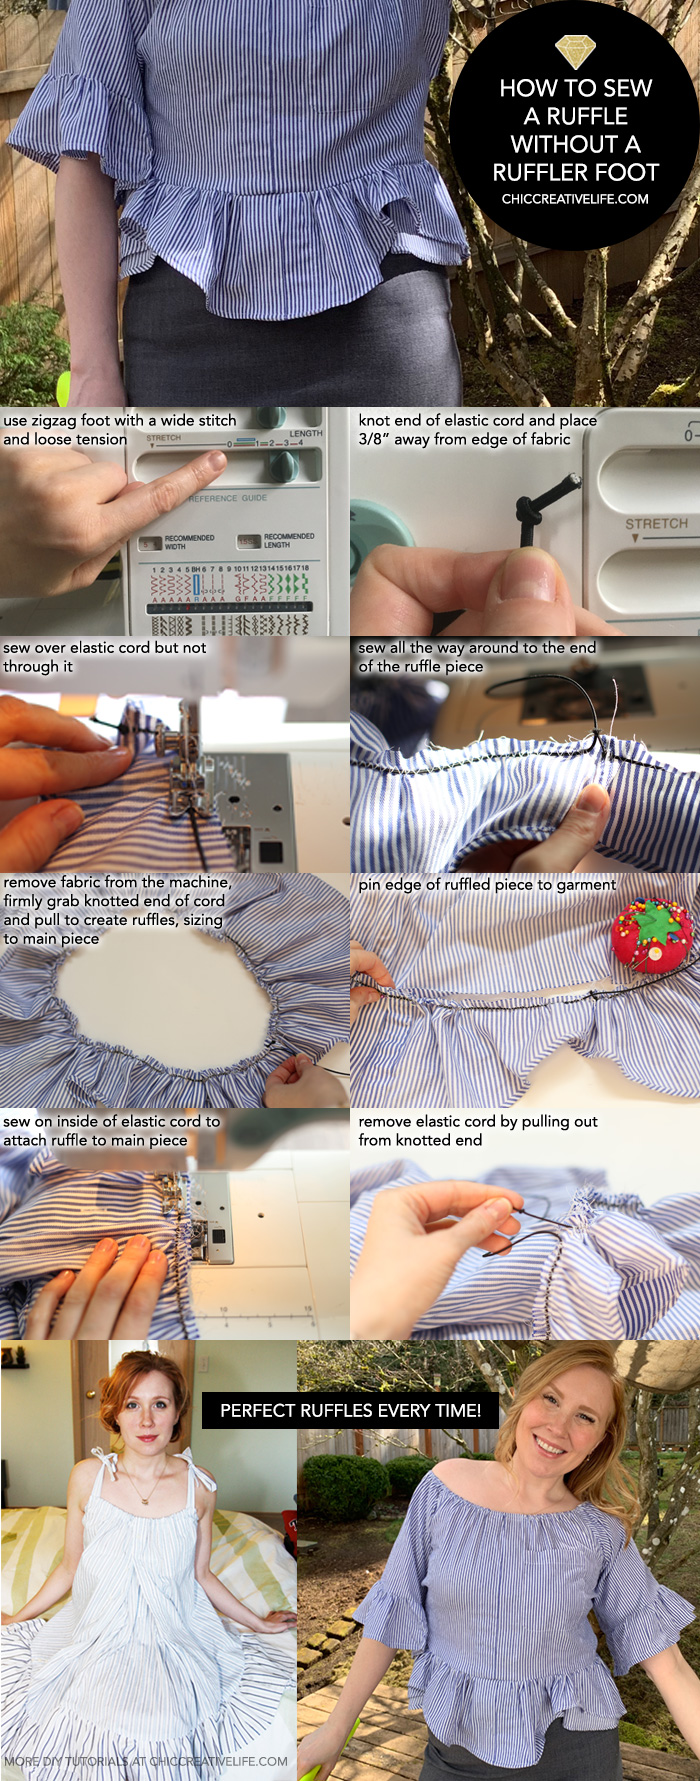
You Need: sewing machine zigzag foot / long length of elastic cord (doesn’t matter what color) / pins
How To:
1. Switch your sewing machine foot to a zigzag foot, and change the machine settings to as wide and long a zigzag as it will go, with a looser tension.
2. Place the straight edge of a piece of fabric you are wanting to create ruffles in, wrong side facing up, under the machine foot.
3. Knot a long piece of elastic cord at the end, and place it on top of the fabric, about ⅜” from the edge.
4. Lower the zigzag foot down in front of the knot, backstitch a few times over the cord (do not go through the cord), and proceed to stitch in a zigzag over the cord down the length of the straight edge.
5. When you stitch all the way around and are nearing the knot in the elastic cord, go as far as you can without hitting the knot, and backstitch a few times over the cord.
6. Remove the ruffle piece from the machine. Pull on the un-knotted end of the cord, gathering the fabric underneath it.
7. Gather the ruffle piece until it is basically the same length of circumference as what you want to attach to, pin it to the other piece, right sides together.
8. Stitch ruffle below the elastic cord to secure it to the other piece, and remove the elastic cord by pulling it out from under the zigzag stitching from the knotted end.
And that’s all there is to it, friends! I’ve created the graphic below for easy pinning so you can save this post and come back to it.
By the way, elastic cord is hard to come by lately – but I’ve had really good luck with searching for elastic cord sold by Etsy sellers. Try them instead of Amazon or the local craft store!
As long as you can sew in a zigzag – you can create a ruffle. Hopefully this will ease any worries you might have about creating the perfect ruffle – and next time when it comes to it, you will know EXACTLY how to sew a ruffle the easy way!
xo
Carly
Leave Comment
May 2, 2016 | Life

“You are my only love.”
-James Joyce
This quote is excerpted from a love letter by James Joyce to the love of his life, chambermaid Nora Barnacle.
Do you have an only love? Is it a person? A pursuit? A thing?
I do – and this is on my mind all.the.time.
Henceforward…love truly, love deeply, love always.
xo
Carly
Leave Comment
Apr 25, 2016 | Life

Live. Love. Laugh.
Advice for the every day. Something I endeavor to do.
Adapted from the 1904 poem “Success” by Bessie Anderson Stanley:
He has achieved success who has lived well, laughed often, and loved much;
Who has enjoyed the trust of pure women, the respect of intelligent men and the love of little children;
Who has filled his niche and accomplished his task;
Who has never lacked appreciation of Earth’s beauty or failed to express it;
Who has left the world better than he found it,
Whether an improved poppy, a perfect poem, or a rescued soul;
Who has always looked for the best in others and given them the best he had;
Whose life was an inspiration;
Whose memory a benediction.
xo
Carly
Leave Comment


