Feb 12, 2015 | DIY
The big V-day happens to be Saturday this year, and it’s now a countdown to what to get, what to make, how to profess your undying love to the one true person in your life. Here are a couple ideas from my archives if you need something to make last-minute:
 DIY Ombre Typography Pillows
 DIY His and Hers Leather-Bound Book Necklace/Keychain
 DIY French Macaron Stack Card Holder Memo Stand
 DIY Patterned Silver Leaf Photo Frame

DIY Faux Geode Quartz Paperweight
 DIY Healthy Natural Coconut Oil Stick Deodorant

And, from a previous year: 15 DIY Valentine’s Day Gifts for Everyone.
 And, if you’d prefer not to give a THING but instead perform an action and make it a memorable experience instead: Romantic Ideas You Can Do At Home for Valentine’s Day Infographic
And, for those wanting to celebrate their singledom, here are a couple great ideas for you too!
7 Single Gals Valentine Day Ideas
xo
Carly
Save
Leave Comment
Jan 31, 2015 | DIY
Hello friends! Gee, this past month went by quick, didn’t it? I wanted to try something a little different as a recap and dig back into the Chic Steals archives for Januaries past to share some of my favorite posts with you that you may have missed. This month marks my 7-Year Blogiversary (can you believe it: SEVEN YEARS!!) and so I wanted to go way way back to near the beginning and see if there were any gems back there. Check out these fun projects and posts!
 Cutting Edge Innovation in Eco Fashion and Style (for FashionTribes.com)
This may have been back in 2010, but some of these innovations are still pretty cutting edge today!
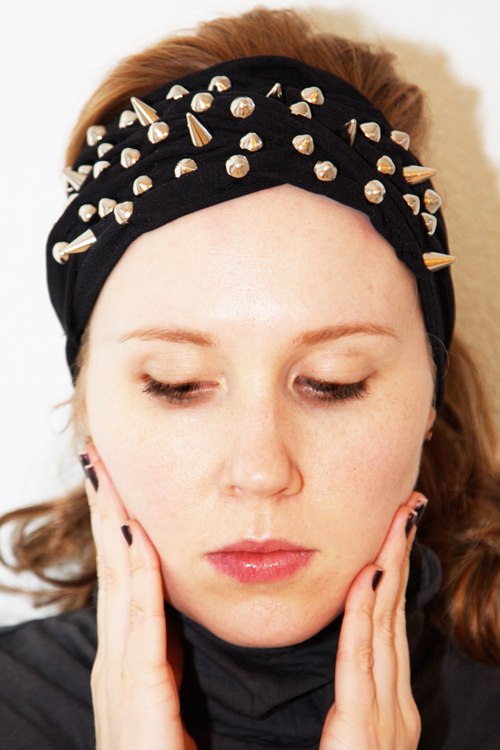
DIY Jennifer Behr Spiked Turban
I had a lot of fun with this project, eating cheese straws and moaning about the price tag on the original. It’s fiddly and difficult to make, but the result is pretty cool.

The Easiest Party Skirt to Make…Ever
I made this skirt out of a bunch of rectangles cut in satin. It turned out pretty well (though the tutorial has no step by step photos so be forewarned).

What is the Fashionista’s Dilemma and What Is Your F.A.P.?
I mused about fashion morality in the face of modern fast fashion. How do you create your Fashion Acquisition Policy into what works for you?

Current Obsessions: Sally Hansen Nail Effects Nail Polish Strips
I have no idea why, but this was one of my most-shared posts of 2011. It’s basically a how-to apply those nail polish strips out of the box.

DIY Woven Ribbon Sweater
Just like at Christian Dior. And totally removable, so when you get sick of it you can start afresh.

DIY Dyeing Feature in Lucky Magazine
I scanned these magazine pages in because I thought they were particularly helpful in dyeing your clothing and accessories. Even boots!

DIY in 5: Cage Cuff
Soooo easy: just wire two cuffs together to make a longer cage-like piece of jewelry. Easy and fun.

DIY Jil Sander Gathered Ruffled Peplum
Kind of a silly, but very fun, accessory. Wear over different skirts in contrasting colors.

DIY Beaded Collar Dress
I guest-posted this for the London Times blog. Great for zhushing up plain resort wear.

DIY Metallic Clutch
I guest-posted this for the London Times blog. I used metallic shelf liner paper over a file folder.

DIY Spike Beaded Woven Choker Necklace
This was one of my most popular tutorials back in 2013. Kinda fiddly but well worth it.

DIY Prada-Inspired Rose Cabochon Earrings
These were super-fun to make, with a huge visual impact. You could even buy the cabs already made (I spied them in the scrapbooking section at Michael’s!)

DIY Vintage Iron-On Decal Leather Keyring Charms
Such a cute project…these would make the perfect gift for someone special.

How to Use the Cartwheel App to Save at Target
If you’re not using the Cartwheel App every time you go to Target, you’re totally missing out! You could save a TON more over Target’s already affordable prices.

DIY A-Morir Embellished Sunglasses
I totally tricked out my sunglasses with rhinestones and beads. VERY 1950’s.

How to Keep Your Clothing Looking Bright and Chic with Clorox
For any brights, you can easily keep them from fading by taking a little extra care when laundering. Here are the tips and tricks to doing that.

DIY Free People Wrapped Quartz Bangle
This was such a fun, easy project – that ended up looking fantastic and was my most-read post of 2014.

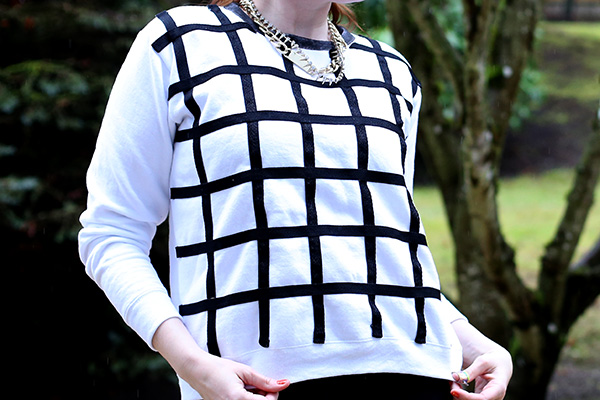
DIY Windowpane Print Sweatshirt
Easy to do this trendy windowpane with some trim and double-stick hem tape.
xo
Carly
Save
Leave Comment
Jan 30, 2015 | DIY, Life

1 / 2 / 3 / 4 / 5 / 6 / 7 / 8 / 9 / 10 / 11 / 12 / 13
Adding embellishments to pieces (crystals, studs, trim, iron-ons etc.) is one of the easiest ways to breathe life into your clothing and accessories and give them a whole new makeover. I’ve done a number of DIYs in the past that involve different materials and techniques (like my DIY Vinyl Eyelash Applique T-Shirt, DIY Sequin Trompe L’oeil Peter Pan Collar T-Shirt, and DIY Jennifer Behr Spiked Turban for example). I’ve found a number of tools are extremely useful in adding all those bits ‘n’ bobs (they save a ton of time!) – and here are my faves:
1. Hardwood Handle Awl
For poking holes for studs and screw-spikes, you need an awl. Period. This will make tiny precise holes (NOT slits like scissors) and the spike screw-thread will do the enlargening itself. Much better to cause as minimal damage to the fabric as possible. The hardwood handle allows for long usage without fatigue in your hands (and if you’re embarking on a large-scale studding or spiking project, you know exactly what I’m talking about!).
2. Chain Nose Pliers
For bending the studs teeth at the back, I always use pliers – though there are also stud prong press tools available for this specific purpose.
3. Creative Crystal BeJeweler Pro Embellishment Tool
For adding hotfix crystals or nailheads to your projects one-by-one: completely necessary for precision and beautiful designs.
4. Dual Duty Plus Button Thread
TOTALLY different from regular cotton mercerized or polyester thread. Did you know? I didn’t for a long time – and I’d been sewing on buttons using completely the wrong thread for like FOREVER. It’s thicker, stronger, and more durable than the regular threads, so get this if you are sewing on any buttons or button-like embellishments.
5. Dritz Fray Check
You’ll need this as a double-security for the ends of trims that could fray when washed. If they can’t be heat-sealed with an open flame (like they have beads, sequins, or are mostly cotton) then add a daub of this on the ends to prevent fraying.
6. Chalk Pencil
Marking chalk set – I use this SOOOO much! I can mark with a different color than for the sewing lines or matching lines when making a piece, and it stays fairly sharp and accurate. I really love this little tool.
7. Dritz Curved Needles
For sewing rhinestones in settings (with sewing holes in the back) onto fabric surfaces easily.
8. Aleene’s Jewel-It Embellishing Glue
For gluing crystals or other embellishments that don’t have sewing holes. Not ideal, but sometimes you have to cut corners.
9. Leathercraft Pyramid Rivet Studs Setter
If you’re doing large-scale studding on leather this will save your hands from massive pain.
10. Martha Stewart Multi-Purpose Cutting Heat Tool
I use this mostly for the mini-iron capabilities. Not completely necessary (in a pinch I’ll just grab my regular size iron and be really, really careful) – but this works great for larger iron-on embellishments that don’t fit the Hotfix iron tip, and for small appliques. I don’t particularly like the hotfix tip (not enough options), but the cutting tip is useful for cutting stencil vinyl.
11. June Tailor Non-Stick Pressing Sheet (18″x18″ size)
For appliques and fusibles. You could also use a regular 100% cotton pressing cloth, but the non-stick one is better for fusibles.
12. Beadaholique Perfect Positioner/Jewel Setter Tool
Needed for rhinestone placement and setting. And when you’re going through a lot of stones in an intricate design, this will really cut your workflow time in half.
13. Variety of Machine Feet
Multi-foot set – if you’re doing embellishments that require a sewing machine (like adding ruffles, or leather pieces, or pearl piping) — you will need a ruffler foot, piping foot, or Teflon foot to deal with these different materials and make the whole process faster. (the pack pictured is for low-shank machines)
And of course a screwdriver for tightening screw-spikes, a lighter for heat-sealing trims, and a pair of scissors for cutting.
Need more Must-Have Tool Sets? Check out my Must-Have Tools for Sewing DIY’s and my Must-Have Tools for Jewelry DIY’ing!
xo
Carly
FTC Disclosure: This post contains affiliate links, which means I make a small commission if you click and buy something through one of the links above. My full Disclosure Policy is here.
Leave Comment
Jan 20, 2015 | DIY
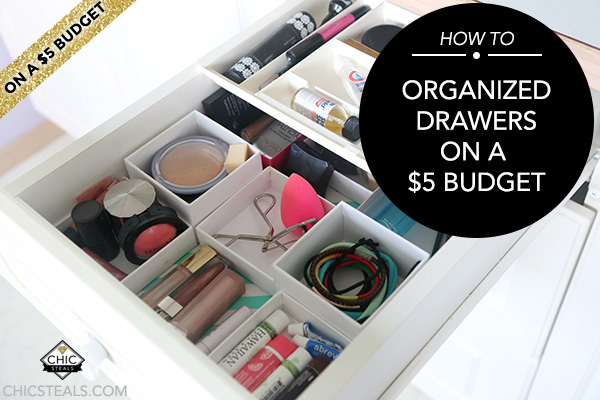 I love love love organized drawers. When you open them, every item in its proper place, catalogued and corralled, and I just can’t help but smile. Who wouldn’t love to be able to find everything you need, right at your fingertips? And don’t get me started on the kind of heaven that The Container Store is for me. Yup, I love organized drawers – but doing so can be kind of pricey if you spring for brand-new containers and liners and the like. With a little bit of planning ahead, you can clean up all your dirty secrets – for around $5. Here’s how:

Before: Quelle horreur!
You Need: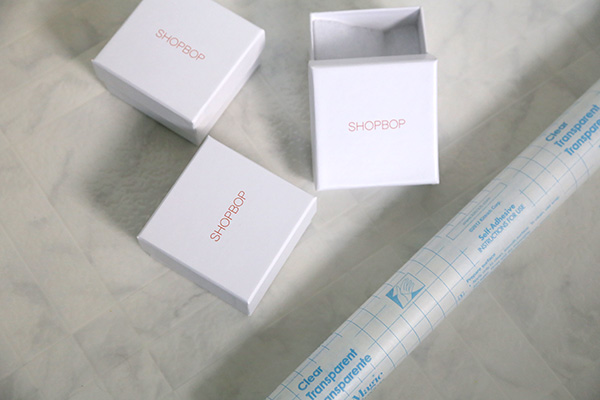
clear adhesive Con-Tact Shelf Liner * / your favorite wrapping paper* / measuring tape / double-sided tape / scissors / pen / extra jewelry boxes, shipping boxes, or other small boxes
How To:
*You could always skip using these two items and just purchase a 2-for-1 like Chic Shelf Paper. They have a lot of great designs, plus they have a waterproof option for the linings of bathroom or kitchen cabinets, which need to withstand moisture on a daily basis. It is a little pricey, so I went with some wrapping paper I liked (which affords you endless possibilities) from Target (Spritz, in teal chevron) and Con-Tact paper, which is cheaper.
1. Remove all your stuff from the drawers and lay it out. Purge ruthlessly! Pile stuff into a pile of things you need every day and need immediately at hand.
2. Clean out the drawer by wiping it down of debris and dust. Makeup remover and nailpolish remover can be godsends to get crusty makeup spills out of the bottom.
3. Measure inside of drawer and cut a piece of wrapping paper the size to fit.
4. Peel the backing off the Con-Tact paper and place it sticky side up on a flat surface. Adhere the wrapping paper piece to it carefully by turning it upside down, so the patterned side is stuck to the sticky side of the Con-Tact paper. Smooth out any bubbles.
5. Trim the Con-Tact paper to the same size as the wrapping paper piece.
6. Place in the drawer, securing with double-stick tape to the inside of the drawer.
7. Try your jewelry boxes (and lids!) in different configurations until you find something you like. You could optionally spray paint the insides a contrasting color (or add some glitter – woohoo!) but I preferred the white.
8. Use double-stick tape to secure each box down to the Con-Tact sheet, and to each other (where needed). I decided to let some spaces in between the boxes so I could see the Con-Tact paper showing through.
9. Re-fill your now sectioned and organized drawer, paying attention to how you use it and what you need to grab immediately (which would go in the front or top – the easiest-to-reach places).
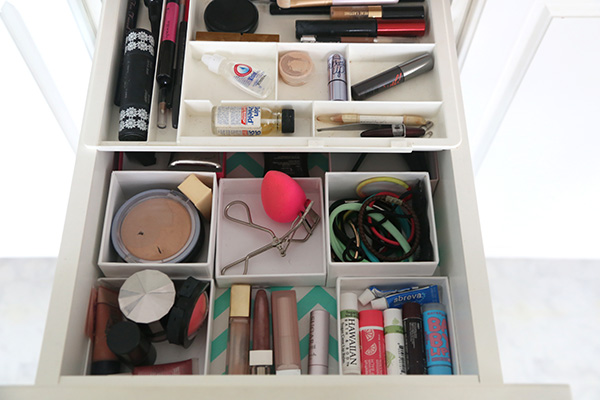 You’re done! Revel in your newly-organized drawer, and breathe a sigh of happiness every time you open it.
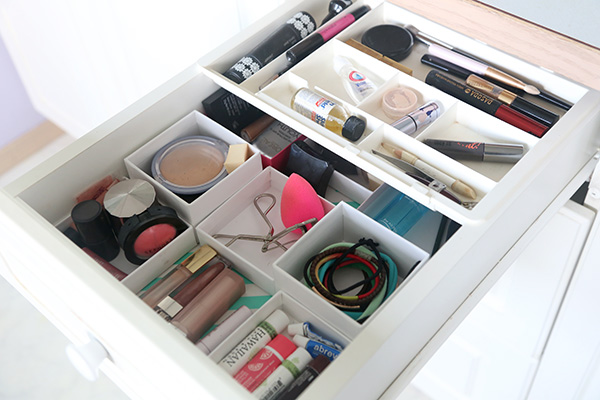


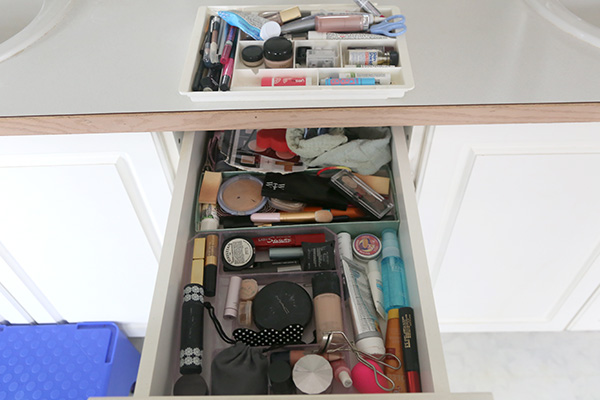
From the above…

To THIS!!
And one more time, a side-by-side Before and After…
Happy Organizing!
xo
Carly
Did you like my $5 Budget tip? Leave your ideas for another one you’d like to see DIY’d in the comments!
Save
Leave Comment
Jan 1, 2015 | DIY
 Hello, lovely readers – it is now January 1 of the New Year. Somehow I thought 2015 was going to be a bit more…futuristic. Like with hoverboards and time displacement vortexes. I’m a little disappointed.
As you may have noticed, there’s a bit of construction going on around here. I’m sprucing things up, starting with a new website theme for Chic Steals and new functionality. Plus new content is on the way! Still working and tweaking, though (you may have noticed my DIY Galleries are down right now as I have to rebuild the whole gallery from scratch)…so it will be a little bit of time until everything is sorted out and running smoothly.
2014 was an absolutely awful year for me, personally – not going to lie – and 2015 is not looking very promising either…can I just skip over it and arrive in 2016?? 😉 There’s been something going on in my life that I am still unable to share on the blog because everything is still completely unresolved and things are in flux. When I know more, and it is finally in the aftermath…then I can share, but right now I cannot because I could impact my legal position. Seriously, it’s THAT bad.
Onto lighter topics. In any case, I’d like to share with you a round-up of the DIY’s I shared on this blog in 2014…like I do every year around New Year’s. Perhaps you missed one or two? Check them out below!

I was working as a Guest Contributor for WeHeartThis for awhile, until I got too overwhelmed with the personal stuff. Above are my DIY Alphabet Earrings. Made from pasta.
I noticed that Windowpane-print was trending…so I created a boldly graphic Windowpane Sweatshirt using black trim.

My DIY Free People Wrapped Quartz Bangle was a huge hit and was probably my most-shared DIY of 2014. Easy and full of impact – what’s not to love?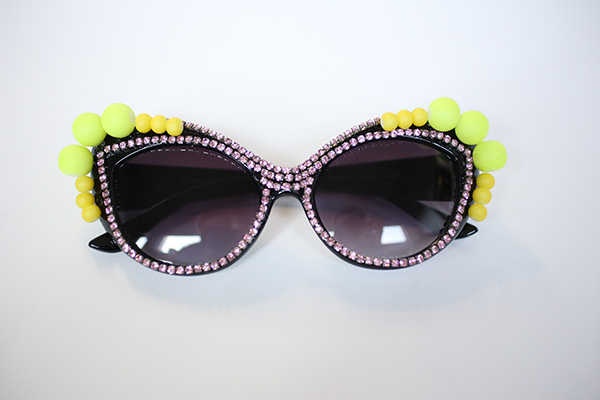
I went a little crazy and decked out a pair of sunglasses with Sunglass Warehouse A-Morir style with rhinestones and beads.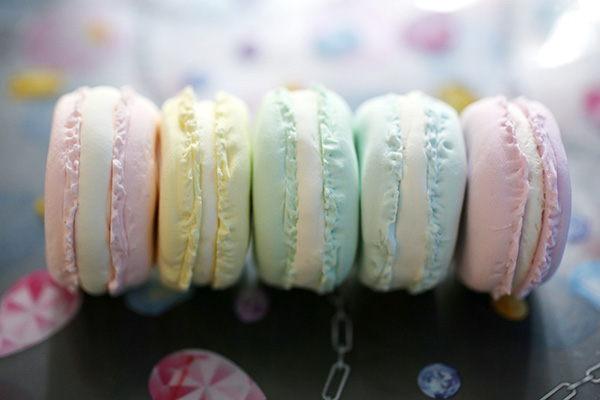
Finally delving into my love for Deko Sweets, I shared how to create these cute and realistic Pastel Clay French Macarons.
You can use those clay macarons to make cute crafts – for example, these Stacked Macaron Card Holder Stands.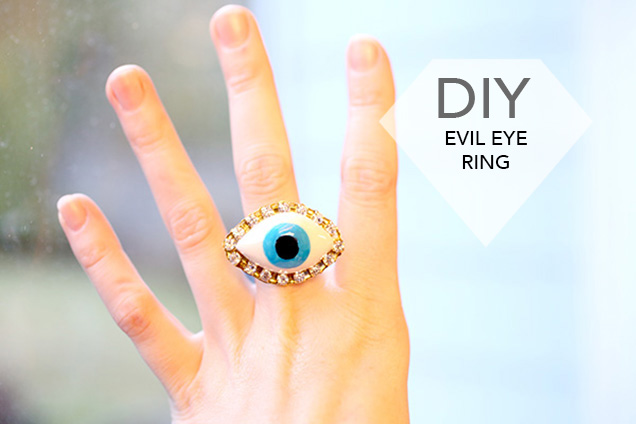
Another post for WeHeartThis: my DIY Evil Eye Ring made with clay, paint, and rhinestone trim.
Partnering with Tulip Neon and I Love to Create, I made a Faux Stingray Clutch using dimensional fabric paint.
I refashioned a sweatshirt into a Tied-Sleeves Skirt a la Chloe.
I shared a tutorial for making a cute Chocolate Chip Cookie Macaron Coin Purse – which people loved. I have to make some more of those!!
With Easter coming up, I made some DIY Gold Speckled Easter Egg Nails.
I designed some DIY kits for Wander & Hunt, namely this Anthropologie-style Rhinestone Ribbon Belt…
…And this Dannijo-style Rhinestone Pendant. (The kits both sold out!)
For Father’s Day, I made a Patterned Mod Podge Silver Leaf Photo Frame.
I worked with Darby Smart to create this high-end-looking Agate Keepsake Box – and the kits are still available here for purchase!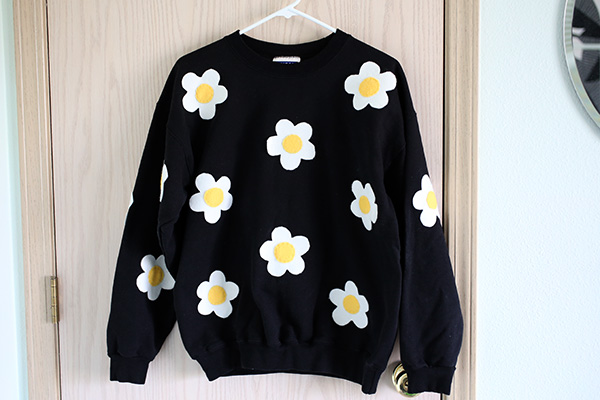
Noting that Daisy-print was trending, I made an Iron-On Daisy Applique Sweatshirt. Very Mary Quant!
For Summer I crafted up another Deko Sweets piece: this Ice Cream Cone Necklace with Polyform Souffle Clay.
I felt my home needed a bit of decoration, so I created a knockoff Handwriting Quote Pillow for my bedroom…
…And a couple of outdoor Ombre Typography Pillows with Tulip Tie Dye and I Love to Create.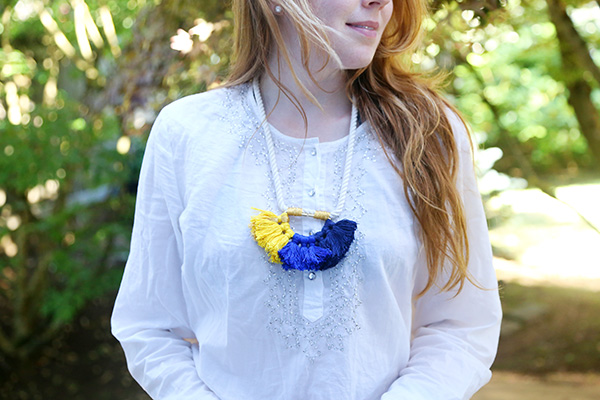
I loved making this Anthropologie dupe of a Colorful Tassel Necklace for Summer!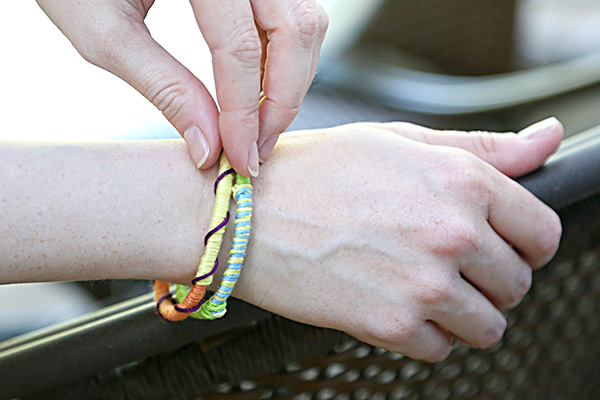
Making these Thread-Wrapped Mexican Bracelets with TrenDIY and their kits was super-fun.
I made an Ombre Night Sky Pedicure featuring Julep.
I also finally finished my Galaxy Print Mini-Skirt, made from the Blue Star Field Galaxy Fabric I designed and sell on Spoonflower.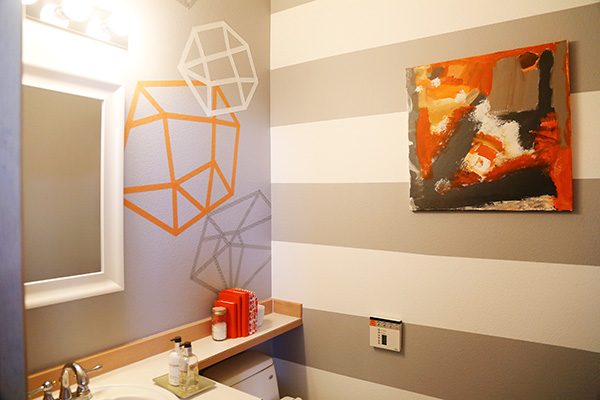
It took me a couple months to redo my downstairs bathroom into a modern Geometric Makeover – but it was totally worth it!
For those who need to add some fabric to a simple T-shirt dress, I shared the Alteration 101: Making a Dress Bigger how-to here.
Inspired by Tom Binns, I created a Rhinestone Neon Cameo Necklace. Would Marie Antoinette approve?
Partnering again with Tulip and I Love to Create, I made a Glow-in-the-Dark Skull T-Shirt for Halloween.
I had my eye on quartz paperweights and objets for awhile…so I just made a Faux Quartz Paperweight out of quartz pieces and beach glass vase filler…that looks so much like a real chunk of semiprecious stone that you’d be surprised!
I made some stuffed Illustrated Woodland Ornaments for my mini Christmas tree.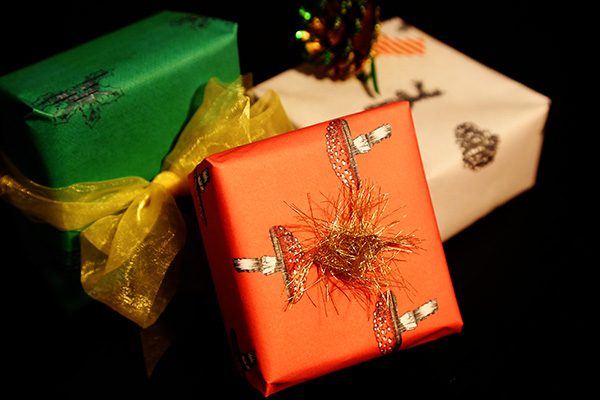
I then took the illustrations I made and designed some Printable Illustrated Wrapping Paper for wrapping small presents.
Well, that’s it! Not as many as 2013…but hopefully this coming year will be better and filled with more fun, creativity, and above all, DIY’ing!
May 2015 bring many wonderful things your way!!
xo
Carly
Leave Comment
Dec 12, 2014 | DIY

 Part of the wonderful anticipation that leads up the Christmas holiday is buying (or DIY’ing!) your holiday gifts, wrapping them with fun, festive paper and ribbon to conceal what’s inside, and arranging them under the tree. If you’re in a pinch and need to wrap something last minute, or want to add a little DIY touch to your wrappings as well, why not print your own gift wrap on your printer at home?
 (more…)
Leave Comment


