Mar 1, 2012 | Beauty
 I’ve been enjoying Sally Hansen Salon Effects Nail Polish Strips for awhile (mostly in the pretty glitters they offer!) – and was pleased to see that they’ve come up with some great new patterns, just in time for Spring!
I picked up the pink polka dot pattern (“Pink-A-Dot“) the other day – and as soon as my fluorescent yellow mani needs replacing, I’ll be trying this one out! (which will probably be soon…ahem)

photo from my January review last year
The review I posted of them when the original colors came out last year garnered a lot of interest; if you’d like to check out the post to see the step-by-step, you’ll find it here!
What do you guys think? Any pattern/color strike your fancy?
…And if you’re looking to buy them, you can find them at Walgreens, Target, CVS, and other drugstores nationwide…as well as online at Ulta.com!
xoxox
Carly
flower texture source; product collage by me.
~If you liked this post, please share it!~
Leave Comment
Jan 16, 2011 | DIY
I spied this in the store the other day and promptly snapped up 2 to try!
I’ve bought the Nail Rocks nail sheets (that need to be set with the heat of a dryer, which I haven’t experimented with just yet), and tried out the Incoco-brand Color Enamel Strips in the past, which I enjoyed but were a bit tough to apply.
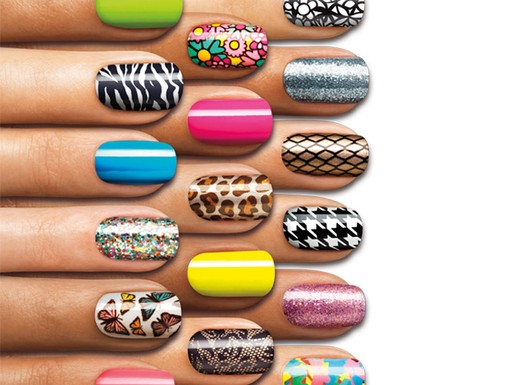
Look at all the beautiful colors and patterns the Salon Effects come in!
The Sally Hansen version of this idea takes the difficult application inherent with other brands and makes it super-easy, with an orange stick and nail file included in each set. And what I haven’t seen before with these stick-on nailpolish sheets is the amazing range of colors: Sally Hansen is offering glitter, photo-realistic effects, fun patterns, and bright colors. And they’re super-easy to use!
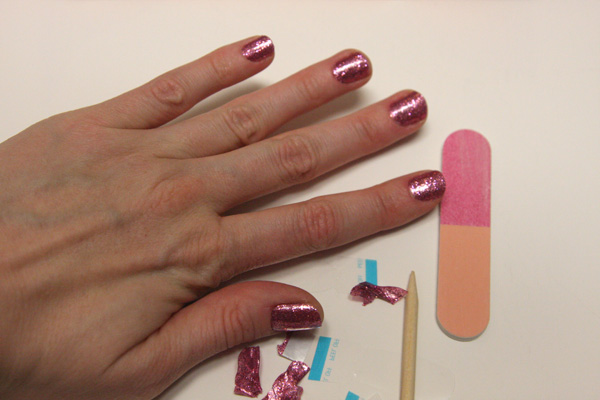
There are 16 sheets in a packet (and though you could probably use a single sheet for 2 nails if you were super-careful and enterprising); they’re meant to be used one sticker = one nail. You need to find stickers that approximate the shape of your nail bed, peel off the protective coat, peel off the back, snap off the paper tip (I found it easier to do the last two steps in reverse order), and place onto your nail.
You use an orange stick (included in the set) to press down the edges, and then the included nail file to crease the sticker sharply at the nail tip, and the sticker rips off.
Pros: Easy to use, fast (once you get the hang of it), brilliant colors and effects, long-lasting (I hope – the package says 10 days!), no drying time required, no need for other things to buy to do your manicure (topcoat, base coat, etc), no bumpiness to the glitter; DBP, toluene and formaldehyde-free.
Cons: A little smelly (like real nailpolish), packs come vacuum-sealed so they’re kind of hard to rip into, stickers prone to ripping if you press too hard with the orange stick, difficulty in finding a shape match to your nail bed, waste of sticker part that you rip off, a little pricey.
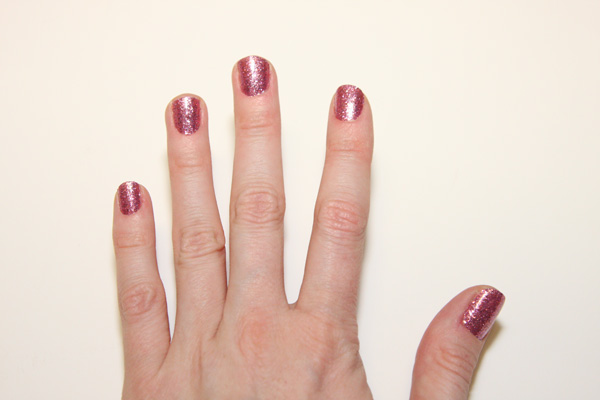
At about $9.99 a pack they’re a little more expensive than your average nailpolish, and they’re only single-use, so once they’re done, they’re done. But the effects are amazingly bright, pure color, with a streak-free and consistent finish, and the tops are smooth without the need for a topcoat!
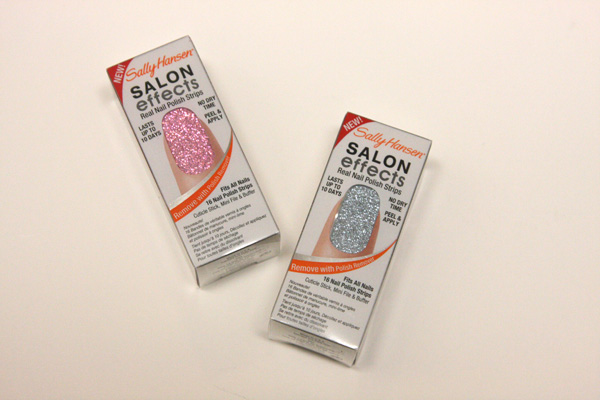
Right now I’m trying out the pink glitter (“Bling It On”) and the blue glitter (“Blue Ice”) is next on my list!
Already in stores like Walgreen, Target, and CVS, this product is supposed to be available throughout drugstores in the U.S. by February 2011.
What do you guys think? Something cool you’d like to try? Or a little too pricey and bothersome to mess around with?
xoxox
Carly
~If you liked this post, please share it!~
Save
Leave Comment