Apr 9, 2015 | DIY
 Hi friends! It’s been awhile since I’ve shared a DIY here, for many reasons.
Life took over for awhile.
But I’m back – with a fun and easy DIY for you all to try out!
Big, bejeweled pendant chandelier earrings have been on-trend for awhile now…but unless you’re planning on whipping out that soldering torch and applying to your rhinestones…they’re a little hard to make.  Enter translucent vinyl PVC as a backing – plus some strong glue – and you don’t ever need to pick up that pesky torch. Here’s how to make your own designer-style illusion jeweled chandelier-style dangle earrings:
You Need:
PandaHall Acrylic Beads (I used the Mixed Color Transparent Acrylic Faceted Drop Pendants in light pink / PandaHall Mixed Acrylic Rhinestone Montee Beads in light pink, hot pink, and champagne / earring pads with backs / large jumprings (I actually used 2 per earring so 4 total) / transparent PVC vinyl / pliers and jumpring tool / glue for plastics and metals (I recommend Loctite but had run out when I made this project!) / awl or needle / scissors (smaller scissors are better I found, like nail scissors)
How To:  1. Lay out the beads on a flat surface to determine placement of the rhinestones.
 2. Use a generous dab of glue on the back of each rhinestone to glue it onto the transparent PVC vinyl. Space your rhinestones apart to allow for cutting them into separate pieces if you desire.
3. Once dry, use scissors to cut around the rhinestones. (I chose to cut around some clusters of rhinestones separately so I could join them with jumprings for more dangle.) Make sure to round your corners.
 4. Glue the earring pad onto the back of the earrings, and allow to dry.
5. Use an awl to pierce the vinyl for each separate rhinestone cluster that you want to connect, and at the middle of the bottommost rhinestone cluster, near the edge.
6. Connect a Drop Pendant to the bottom of the earring with a large jumpring.
7. Connect all the pieces with jumprings to complete your earrings.

And that’s it! They’re surprisingly stable and will withstand some wear (though I wouldn’t recommend running obstacle courses in them).
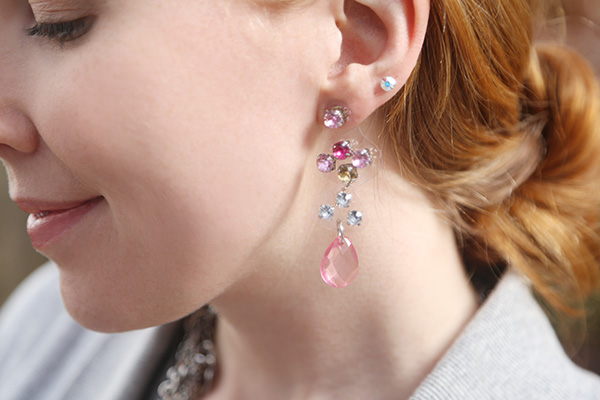
I also made some alternate-colored ones in the trendy asymmetrical earring style.

I love how they look disconnected – almost floating – above your shoulders – utterly utterly chic with a backswept ‘do and a pretty necklace for Spring.
 Happy DIY’ing!
xo
Carly
Save
Leave Comment
Jun 29, 2014 | Fashion
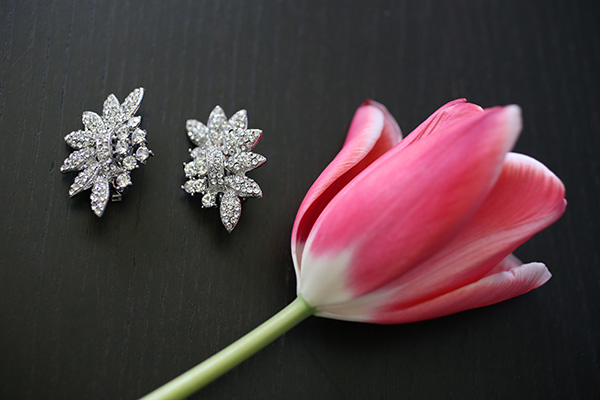 It seems clip-on earrings are having a moment again – and rightly deserved, since they are more versatile than one would think! Not just limited to earlobe decoration, clip-on earrings can be incorporated into your wardrobe in a variety of surprisingly chic ways.
 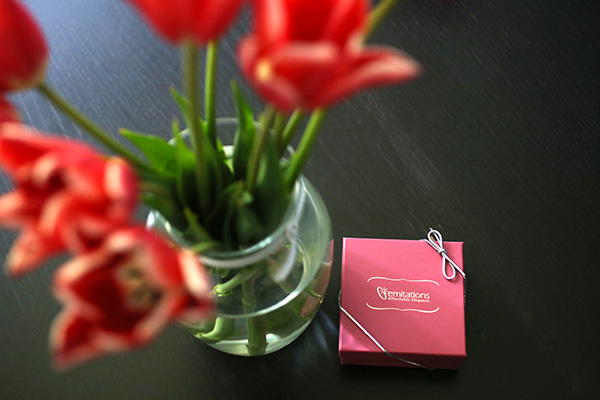 Emitations.com sent me a pair of sparkly clip-on earrings to style, and here are a couple ways I came up with to let their beauty shine:
CHIGNON DECORATION
 One of my favorite ways to wear clip-on earrings is to use them to adorn my hairstyle – and they look especially fabulous in an updo. Perfect for graduations, evening soirees, and dressy events, a little bling in your hair can go a long way.
COLLAR ACCENTS
 Taking a page from Michelle Obama’s playbook, using a piece of sparkly jewelry in an unexpected place – like the collar of a coat or dress – lends your ensemble a major dose of refinement. Adding a pair of clip-on earrings right at the front opening of a coat creates focus on the face and ups the glam factor.
SHOE CLIPS
 Adorn those plain pumps with a sweet pair of clip-ons! Having a small amount of sparkle at your feet can make you feel like a true Cinderella. Unlike true “shoe clips,” clip-on earrings don’t have the teeth on the underside of the snap, which means these won’t ruin your shoes like shoe clips can.
There are a ton of great clip-on earrings to be found at thrift stores, flea markets, and Ebay – as well as brand-new, gorgeous options available at Emitations.com (they look just like the real thing it’s almost impossible to tell!)
 Do you have any ideas about how to style your clip-on earrings?
xo
Carly
FTC Disclosure: I received a pair of clip-on earrings from Emitations.com to review and style in a post. I have received no compensation for this post and the above opinions are my own. To read my full Disclosure Policy, click here.
Leave Comment
Jul 21, 2013 | DIY
 Back when I worked on the May campaign with Martha Stewart Jewelry, I actually made a couple of pieces while playing around with the treasure trove of supplies I was sent. (Only my DIY Enamel Spring Flower Bib Necklace made it to the blog for the campaign post.) But I also made these earrings, and though I don’t have a shot of me wearing them yet (Hub has been working odd hours ever since we got back from Japan), I still wanted to share the how-to with all of you.
I’ve always been drawn to the intricate nature of filigree pieces and love its versatility (I even used it for the backing of the bib necklace above!). It reminds me of ancient scrolling and iron work – perhaps more suited to Guinevere’s or Cleopatra’s time than the modern minimalism of today. Of course these jewelry findings are not true filigree (which is made of soldered wire that is curved and bent to form patterns), but instead is created with dies cutting the pattern into metal. Incorporating them into your jewelry will add a sophisticated touch with a vintage feel, and adding crystal components and a wash of color from the Martha Stewart Jewelry line is a great way to truly customize your pieces. And you only need to be able to link jumprings and wield a paintbrush! Here’s how: (more…)
Leave Comment
Oct 13, 2011 | Fashion
 I do so love it when an affordable brand takes a trend and re-interprets it for the masses, rather than producing a direct knockoff. Extrapolation on an idea is always fun, and I love to see thoughts flow in a new direction. What would also be cool with these chain earrings available at Macy’s would be if the designers had explored perhaps different color combinations than just black-and-gold, which strongly evoke the Chanel version. (Or maybe it’s just the pieces that were chosen for the ad, and there are a ton of other variations available in-store.)
What do you guys think?
Too much alike, or just hitting that right spot?
xoxox
Carly
*scan from a Macy’s ad placed in a November 2011 U.S. magazine. Runway photo from the DailyJewel.com
~If you liked this post, please share it!~
Leave Comment
May 26, 2011 | DIY
 I’ve been so busy lately I’ve been neglecting to share things that I’ve made. Here are a couple items that I’ve finished up and am enjoying:
Galaxy-Print Scrunchie

Make following this tutorial from some leftover self-designed galaxy-print fabric scraps. I’m making a top with the fabric and since the tiny amount I bought was so goshdarn expesnive, I didn’t want to let any part of it go to waste. The fabric is silk, backed in black mesh chiffon. I should have made it twice as wide, but I only had so many scraps leftover. It tends to slip out of my hair since it’s silk, so I wear it around a hair-tie.
Tribal Necklace

Made with faux bamboo-stick beads and faux coral beads from Michael’s. I love the spiky organic-ness to it.
Bohemian Leaf Head-band (Head-dress?)

I’m not really a boho gal, but I couldn’t resist crafting this. Take any flat-ish jewely finding that has a hole in either end, and string them together with jumprings to make an adornment for your brow. The leaf findings I used only had one hole, so I drilled another one in the end of each piece. Which took a $%##% long time, too.
Feather Earrings

Made in the style of Owlita. (Theirs are much nicer, though!) I just wired together some feathers and added a handmade ear-wire to them. I love how they mingle in with my hair.
Have you made any projects recently that you’re dying to show off? Do tell!
xoxox
Carly
~If you liked this post, please share it!~
Save
Leave Comment


