Apr 7, 2010 | DIY
Of course, now that I’ve written this all up I see that Style Hurricane has posted her own tutorial, featured in Foam Magazine. Well gosh darn golly gee now I feel silly. In any case, here’s the tutorial I’ve been working on (completely independently – really!!)…
Inspired by a Givenchy piece above (featured on Who What Wear awhile back), I made my own spiked headband. (I’m not paying $500 for the Givenchy one, at any rate! This project will cost you, at the most, $12 if you don’t already have the spikes.)
You Need: (more…)
Leave Comment
Jan 6, 2010 | DIY
 $498 for a piece of fabric with some spikes on it??? Wow.
Jennifer Behr’s couture headbands have been featured in countless magazines (including Vogue) and TV (on Gossip Girl, for instance). Beautiful and distinctive, they are a favorite of brides and Hollywood starlets. They’re hand-made in New York City.
And they’re very, VERY expensive. Take the turban above, for instance.
It’s silk with patent leather and stainless steel spikes, and $498. Come on.
Obviously I’m in a bad mood this morning, noshing on Cheese Straws. Note to self: DO NOT EVER BUY CHEESE STRAWS AGAIN.

Cheese straws: the work of the Devil.
But back to this “turban” headband.
Lately turbans are experiencing a revival: evidenced in part by Forever21 offering up a turban last month on their site – no, not towel wrap for drying your hair, folks…a real, live turban – as fashion accessory. Plus the girls at BleachBlack blogged about wanting one awhile back (I’m just too stuffed with cheese straws lazy to find the link). Eek.
Friendly reader Kay sent me the photo above saying that the Jennifer Behr piece reminded her of my DIY’s. I do like me them studs, heh heh!
So, here’s the DIY if you’re curious…
You Need:
*20-pc bag of 1/2″ cone spikes ($5.59, Studsandspikes.com)
*100-pc bag of 3/8″ cone studs ($2.89, Studsandspikes.com)
*strip of stretchy black fabric (I used a Lycra swimsuit fabric)
Tools: fabric scissors / matching thread / sewing machine / hand-sewing needle / pliers / awl / Phillips screwdriver
How To:
 1. Cut a piece of fabric long enough to go around your head and then some. Mine was about 8″ wide and a yard long.
 2. Fold cut piece in half horizontally, right sides together, and stitch along long edge.
 3. Turn piece right side out and you now have a long tube.
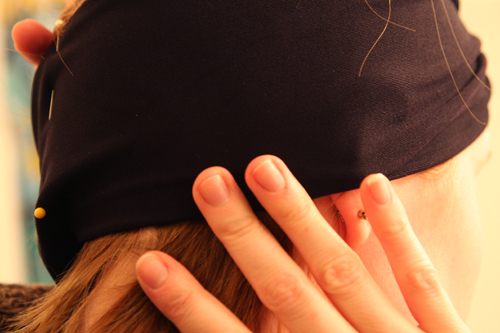 4. Wrap the tube around your head and pin at the correct length. (I made a single twist in the fabric at the front center.) Make sure the tension is correct – you need it a little looser than what you would think is a good tightness for a headband/wrap, lest you get a headache after wearing it all day.
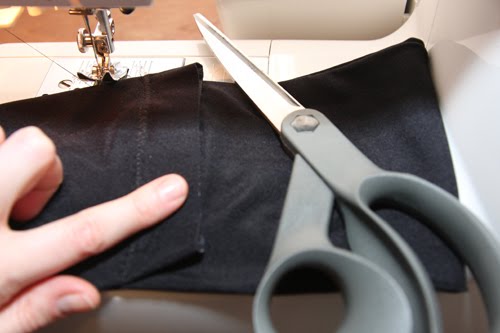 5. Sew ends of wrap together (right sides together). (not pictured) Then fold seam allowance to inside of wrap, cut excess. This will give you a clean seam on the outside of your wrap. Sew one more time vertically down that seam allowance to secure it down. (not pictured)
—>If you just want a plain twisted-front turban like the Olsen twins below…you’re done! If you want to spike it and stud it like Jennifer Behr’s piece, keep reading… Tutorial continued…

6. Try on head-wrap; bunch it up in a couple places and pin. 7. Hand-tack the bunched-up areas so the piece has a “gathered” look to it.
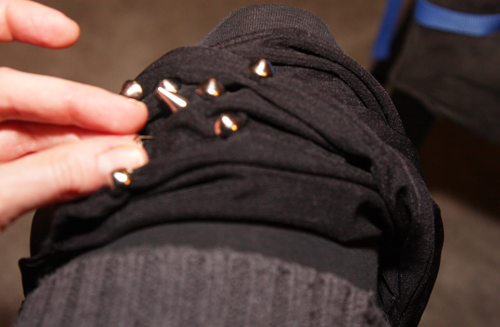 8. Now we stud! I slipped the turban over my leg and sat it on my knee for stability. I pushed the prongs of the cone studs into the fabric, and folded them over on the underside of the fabric using pliers.
 9. Then use an awl to pierce the holes for the cone spikes, which have a thick screw that needs to pass through the fabric. (The easiest way to do this is to poke the hole thru from the right side – then thread the spike screw in from the wrong side, following the awl as you pull it out.) Then attach the cone spike tops, and use a screwdriver to secure from the underside. (not pictured)
As you can see above, it turned out kind of like a wide headband!
You’re done! I didn’t add quite as many spikes ‘n’ studs as the Jennifer Behr version – simply because I got tired of it. I actually made a second layer to the piece so the center twist wouldn’t be so narrow and I could stud and spike through the upper layer only. This ensured no scratchy stud prongs would be directly against my forehead, but it turned out that the inner layer was a no-go since the spikes wouldn’t sit properly when there was fabric sitting underneath them. If you do choose to add another piece of fabric inside the headwrap (making it shorter than the headwrap and stitching its edges to the headwrap edges so it’s like a little stitched-down flap inside); I’d recommend studding the cone studs in the upper layer of fabric, but setting the spikes through both layers so they sit right. I know that sounds confusing!
 The fabric’s stretch is a bit of a problem – some spikes may fall out if you pull the piece too much, so this requires care when handling. FRA-GEE-LEH as they say in Italian! (Okay, I guess I’ve seen A Christmas Story way too many times…;-)
What do we think? Does this work? Is this a no-go? Do I look like I am about to join a biker gang?

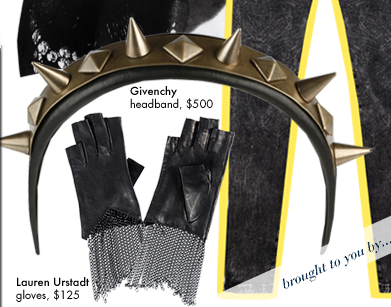 If you need further proof that studded headbands are all that this season, this Givenchy studded headband was featured in WhoWhatWear’s December holiday gift guide. Loving the chain gloves too!
But I’m a little wary of the studs-around-the-head look…they remind me of something quite Biblical. Ah, who’m I kidding?? It’ll be my next DIY, guarantee ya. (DIY available here.)
Happy DIY’ing!
xoxox
Carly
Save
Leave Comment
Sep 1, 2009 | DIY
So you can buy your own even at Fred Flare ($18) or Macy’s now…but early this Spring I couldn’t find these anywhere except online for the staggering price of $72 or something (this was somewhat before the trend broke and Lucky Magazine had showcased one of those headbands in January or so, sparking my interest). So I made my own with a pack of feathers bought at Michael’s for $2.99 (I think they’re guinea?? but don’t quote me on it LOL), and a plain black headband from Claire’s for $3.50.
I cut out an oval from a stiff piece of felt, and hot-glued the feathers onto it, beginning at the top of the oval and working my way to the bottom. This created a nice overlap and I was able to use the fluffy down feathers at the bottom that goes right above the ear, so I look like I have some nice old-man fuzz growing out of my ear there – exactly what I was going for!!
Then I cut out another oval of felt and sandwiched the headband in-between the two ovals, to create a stiff curve. The whole process took about an hour because I was picky about the placement of the feathers.
Of course, I could have just bought a hat pad at Michael’s (which they NOW carry, 6 months after I completed my project) or online at plumesnfeathers.com. (But then again DIY’ing it really gives you complete control over the types of feathers and the placement of them…so to each her own!)
Happy DIY’ing!
xo
Carly
Leave Comment