Jan 6, 2011 | DIY

Yesterday I mentioned it as a more realistic alternative project to the New York Times‘ labor-intensive 3-hour DIY (!), so today I’m going to show you how to make it. It’s DIY in 5 – minutes, that is. The easiest, quickest ways to take a piece from blah to fab and update it to current trends.
Wherever I go I’m always on the lookout for clothing, accessory, or jewelry components that can be used in quick ‘n’ simple DIYs. That’s why
these silver cuffs I spotted in the jewelry-making section at Jo-Ann Fabrics, from the brand-new
Dazzling Geodes line of findings (from Plaid Enterprises) caught my eye. (Technically they’re supposed to be used as a base for adding geode slices and embellishments.) And incidentally, like most of the fashion- and culinary-obsessed, I am a frequent visitor to Luxirare.com. and the Dazzling Geodes cuffs reminded me a lot of
the arm-cuffs she sells in her web-store.

A Luxirare Cuff.
$95 for one of these cuffs is pretty reasonable considering she designed these and has these custom-cast with embossed LUXIRARE logo, and they look pretty hefty and durable…but if you’re in the market for something similar you can use 2 of these affordable findings to make your own version.
You Need:

*2 silver cuffs from the Dazzling Geodes line (available at Jo-Ann Fabrics & Crafts stores)
 *silver-colored dead-soft jewelry wire
*wire cutters/pliers
How-To:
 1. Cut 2 short pieces of wire.
 If your wire is kinked at all, close the pliers on it and drag in order to straighten it.
 2. Line the cuffs up side-by-side and wrap a wire piece around the outer edges where the two cuffs meet.
 3. Weave the wire around the edges (I made a “V” shape as I wrapped), trim the ends down, and use the pliers to push the sharp ends back out towards the outside of the cuff so they won’t scratch you.
 3. Cut a longer piece of wire and secure the center of where the cuffs meet. Twist the ends around each other on the inside, pull ends towards the outside and trim appropriately.
 You’re done! And it may have taken you all of 10 minutes.;-)
Wear with minimalist clothing, sharp contrasts, and architectural details…and stay cool, calm, and cagey with this on your wrist.
 Happy DIY’ing!
xoxox
Carly
~If you liked this post, please share it!~
Save
Leave Comment
Jul 16, 2010 | DIY
To continue on in the theme of strange things to wear on your wrists…
I’d like to share with you how to make your very own pair of pleated wrist cuffs.
As an accessory they may be somewhat unusual – but maybe you noticed them on China Chow from a previous episode of Bravo’s Work of Art? (Episode 3; the one where the artists have to create a piece of art for a book cover; I can’t find the screencap from Bravotv.com. She’s wearing them though!!)
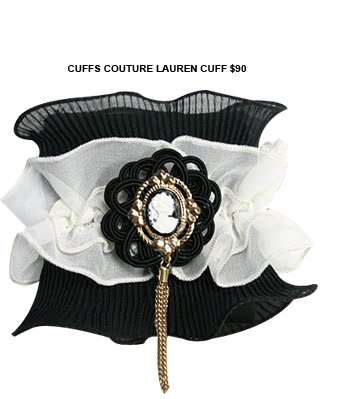
They’ve been seen on celebrities such as Audrina Patridge and Brooke Hogan, courtesy of Cuffs Couture, but at $58-$90 for a single cuff I find this brand a bit out of my budget.
I actually saw the cuffs I got the idea from in a February 2010 issue of Vivi magazine, and thought they were a great idea to wear with bare arms to add a bit of romance to an outfit.
You Need: (sorry for the hand-drawings, I didn’t photograph the step-by-step)

*2 pieces of black woven fabric, each about 3″ wide and long enough to wrap loosely around one wrist with about a 2″ overlap
*2 sets of black velcro strips (the furry side and the hooked side = 1 set), each about 2″ long
pleated white trim (mine was grosgrain ribbon trim I found at Jo-Ann’s Fabrics, though if you can find pleated silk or cotton that would be soooo much better)
*black grosgrain ribbon, 1/2″ wideAnd…
*fabric scissors
*flame
*sewing machine and needle for wovens
*hand-sewing needle
*black thread
*white thread
*fabric glueHow To:
1. Turn under all the raw edges of each fabric piece about 1/2″, and sew.

2. On the underside of one of the smaller ends of a fabric piece, sew a piece of velcro (the furry side out). Do the same for the other fabric piece.
3. Cut 2 pieces of your black grosgrain ribbon and 4 pieces of pleated trim to the same length as your finished fabric pieces.
Use an open flame to heat-seal the edges if they are synthetic fibers; if cotton you will have to either fold the raw edges under or seal them with Fray-Check.
4. Sew 2 pleated trim pieces onto each long side of one of the fabric pieces. Place them just far apart enough so that the 1/2″ wide ribbon placed in-between them will just overlap them in the center. Do the same for the other fabric piece and remaining pleated trim.
5. Sew each piece of black grosgrain ribbon down in the center of the fabric pieces.
6. Make the bow: (For my bow I made two loops; one a little smaller than the other, and placed them on top of each other, gluing the top loop onto the bottom one, then wrapping the center and securing with stitching underneath. You can make two or one or however many loops you want! The methodology is the same anyway. The following directions are for a single-loop bow🙂
*Cut a 2.5″-long piece and a 1.5″ piece of grosgrain ribbon. Double-thread your hand-sewing needle with black thread, and double-knot the end.
*Create a loop with the longer piece of ribbon, underlapping the ends.
*Push your needle into the underlapped pieces to the inside of the loop, then back through and out, pulling the knot tight onto the ribbon underside.
*Pierce the end of the smaller piece of ribbon and push it all the way down to anchor it onto the underside of the loop you just made.
*Curl the small ribbon around the loop, and anchor the other side of it with the needle and thread.
*Sew an X through all layers except for the tops of the loops, knot, and cut the thread.
*Make one more bow.
7. Use a dab of fabric glue to glue each bow onto the center ribbon of each cuff.
8. Sew the other velcro strips onto the opposite ends of the fabric cuffs, onto the right sides, the hooked side facing outwards.
Each cuff is fastened by pressing the strips of velcro together on the underside of your wrists.
The stiffness of the ribbon pleats makes it stand out from the wrist more than I had hoped, thus something that is softer or thinner would be a better choice for the pleating. You could even make the pleating by hand (with the help of an iron) if you were particularly hardcore.
I think they look equally as good with a casual ensemble as with a slinky LBD!
Hope this has inspired you to make your own!
Happy DIY’ing!
xoxox
Carly
~If you liked this post, please share it!~
Save
Leave Comment


 1. Cut 2 short pieces of wire.
 2. Line the cuffs up side-by-side and wrap a wire piece around the outer edges where the two cuffs meet.
 Happy DIY’ing!